Tutorials > Android In-App Purchases
Android App Setup
1. Enter App name and Google Play package name on the form.
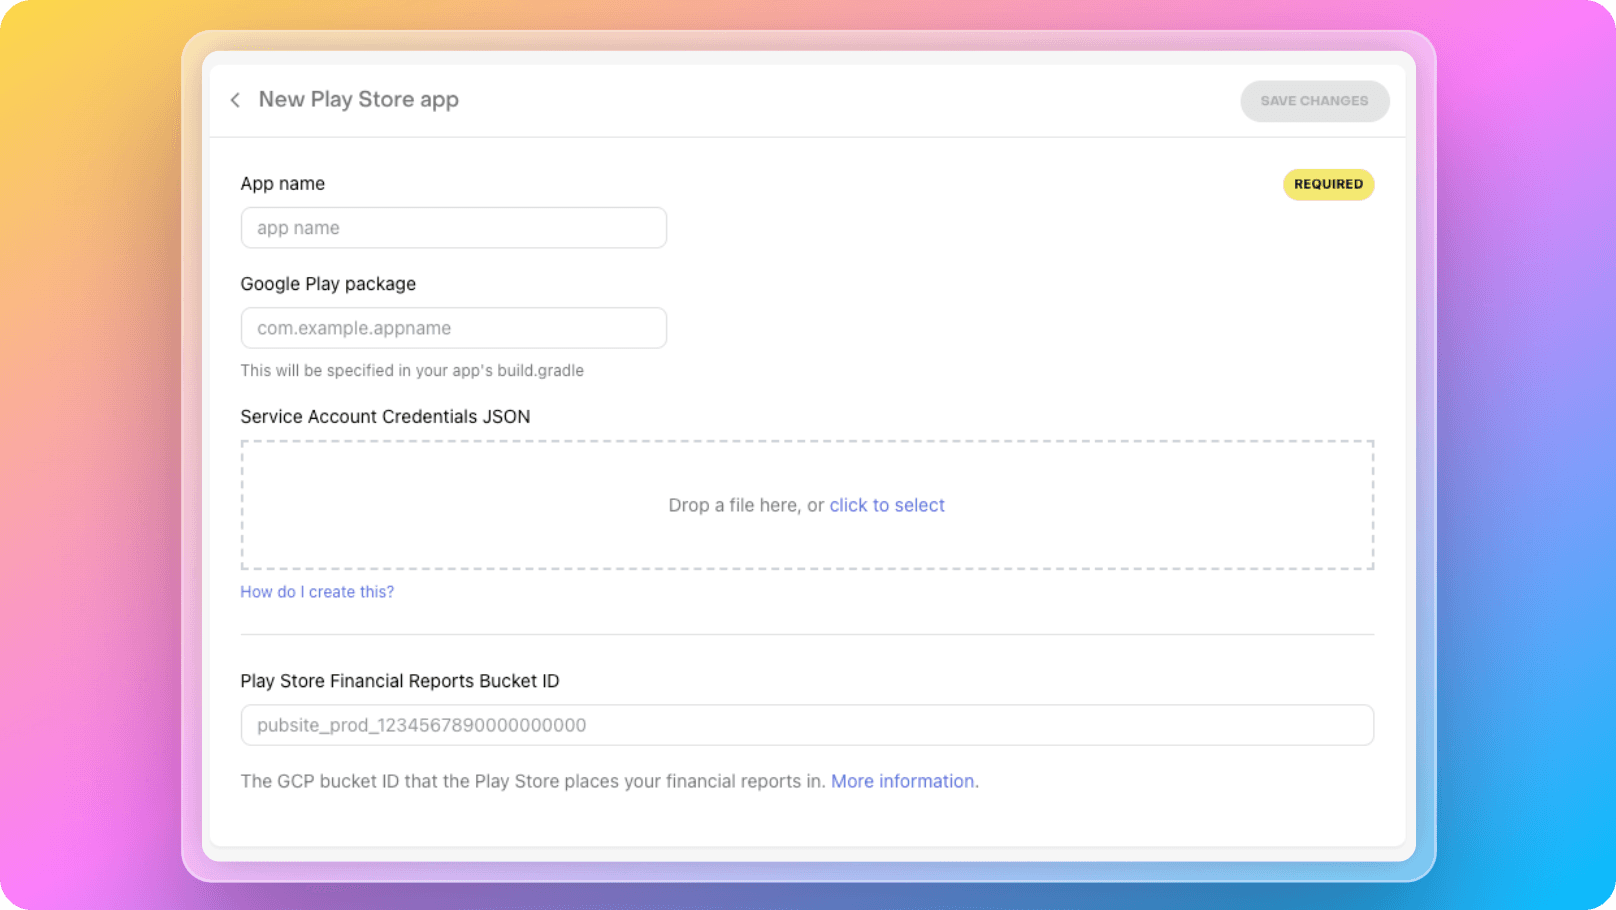
2. For Service Account Credentials JSON you will need to visit Google Play Console and Google Cloud Console.
3. Configuring your android app for RevenueCat is a bit more complex compared to an iOS app, but there is excellent documentation for this process on RevenueCat. Follow the steps in the Configure Service Credentials for Google Play Store documentation to set up your Android app.
Configure Products
You will need to define your in-app purchase products in Google Play Store and register these products in RevenueCat. You can find very detailed documentation from RevenueCat for these processes below.
How to set up products on Google Play
How to register products on RevenueCat
We recommend that you carefully read what is meant by definitions like Entitlements, Offerings, and Products, along with their examples.
Example Configuration
Here is an example configuration for average AI application, the structure of the products would be approximately as follows:
Let's assume your app generates text-to-image visuals using AI. Since generating each visual has a cost, allowing unlimited visual generation through a subscription system would not be profitable for you. In this case, you would need to implement a credit system.
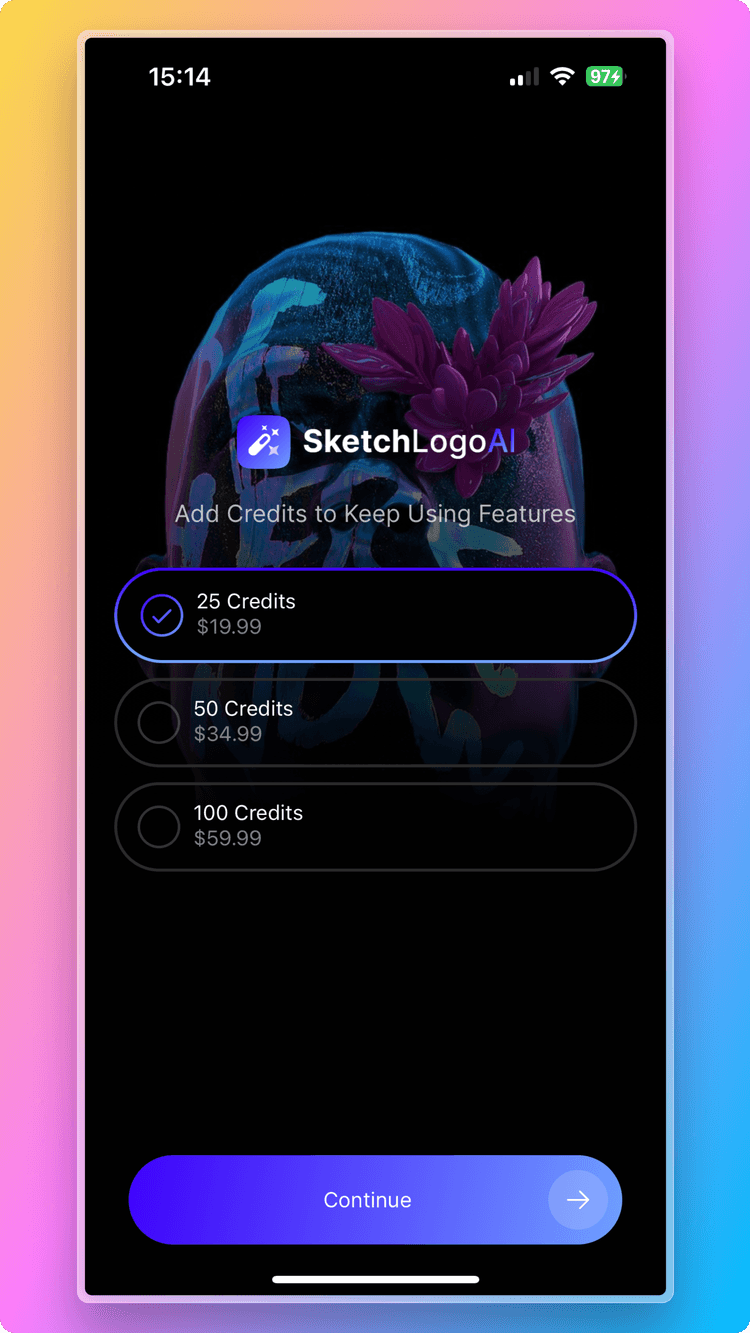
For example, if generating each visual requires 1 credit, users may need to purchase credits. In this scenario, you might want to define the following products in your system with different prices and credit amounts:
Name: 25 Credits
Product Id: 25_credits
Price: $20
Type: Consumable
Name: 50 Credits
Product Id: 50_credits
Price: $35
Type: Consumable
Name: 100 Credits
Product Id: 100_credits
Price: $60
Type: Consumable
However, selling subscriptions to generate passive income and receiving payments from users for months or years is an excellent way to exponentially increase your app's revenue. If you implement features that users cannot use without a subscription, even if they spend credits, you can also earn subscription income.
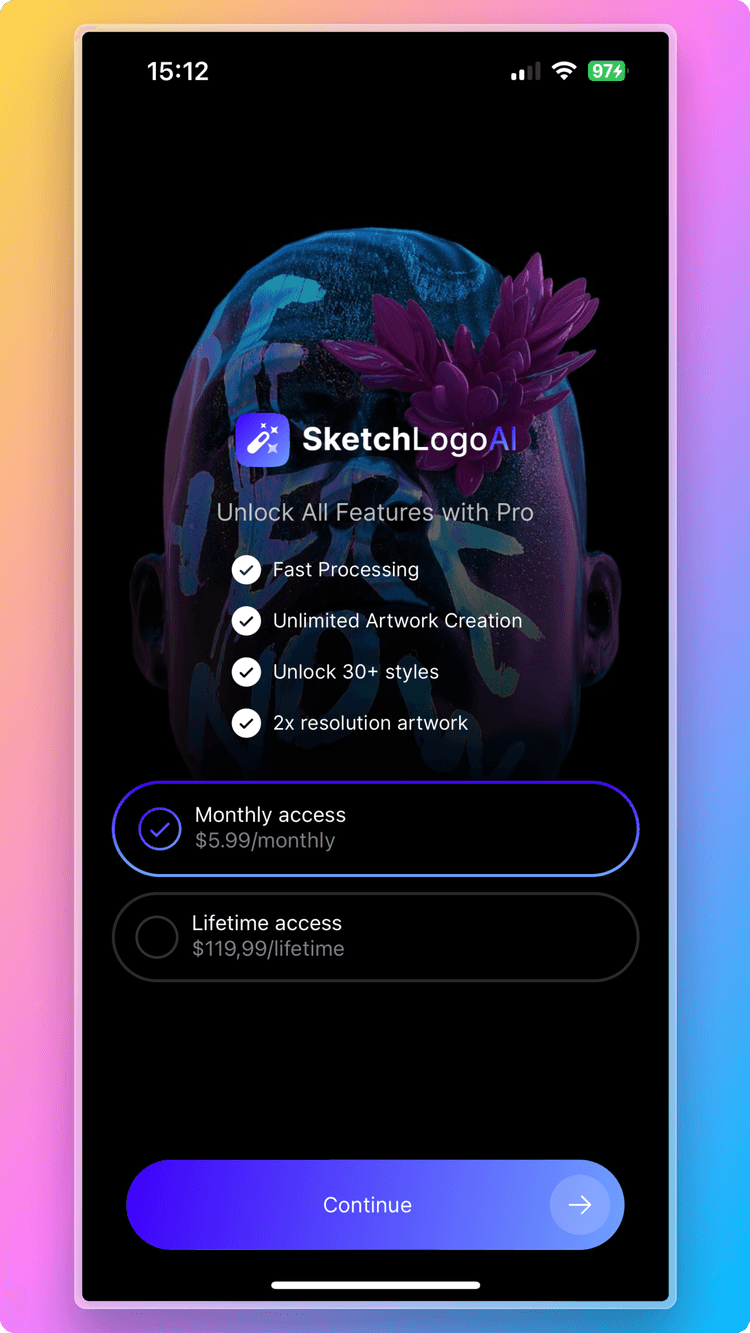
For example, let's assume your text-to-image app has developed a feature that allows users to create models using their own photos. Now, in addition to the previous consumable products, you will need to define the following products:
Name: Lifetime Pro
Product Id: lifetime_pro
Price: $350
Type: Consumable
Name: Monthly Pro
Product Id: monthly_pro
Price: $20
Type: Non-Consumable
Recurring: Monthly
Name: Annual Pro
Product Id: annual_pro
Price: $200
Type: Non-Consumable
Recurring: Annually
In RevenueCat terminology, we need to create an Entitlement entity called Pro on the RevenueCat side. After defining the productslifetime_pro, monthly_pro, and annual_pro, we need to bind them to the Pro entitlement. This way, instead of checking the user's authority with the product name in our mobile app code, we only need to check if Pro is present in the user's entitlement array.
1const updateCustomerInformation = async (customerInfo: CustomerInfo) => {
2  if (customerInfo?.entitlements.active["Pro"] !== undefined) {
3    setIsPro(true);
4  }
5};
Additionally, we will likely implement two different paywalls: one for users who want to purchase credits and another for users who want to purchase subscriptions.
For these two screens, we need to create two separate Offerings entities. Create an offerings entity named Credits and add the25_credits, 50_credits, and 100_credits products to it. Also, create an offerings entity named Subscriptions and add themonthly_pro, annual_pro, and lifetime_pro products to it.
This way, we won't directly use product names anywhere in the code. Instead, we will list products for each paywall using only the offering IDs.
1const loadOfferings = async () => {
2  const offerings = await Purchases.getOfferings();
3  if (offerings.current) { // Subscriptions
4    setPackages(offerings.current.availablePackages);
5  }
6  if (offerings.all.Credits) { // Credits
7    setCreditPackages(offerings.all.Credits.availablePackages);
8  }
9};