Getting Started
Hi Mobile App Maker, welcome to React Native Starter AI
Here's a brief explanation of the React Native Starter AI project structure and how to begin working with it.
We've designed a straightforward, user-friendly project structure so you can dive right into your project. Just follow the steps below to set up your development environment for both iOS and Android devices.
Start your development environment
1. To set up your development environment, first clone the React Native Starter AI repository from GitHub and then install the necessary dependencies.
1
2  git clone https://github.com/ReactNativeStarterAI/react-native-starter-ts [YOUR_APP_NAME]
3  cd [YOUR_APP_NAME]
4  npm install
5  git remote remove origin
Note
Npm is React Native Starter AI's recommended package manager.2. After installing the necessary dependencies, rename the environment variable file on both react-native-starter-ai-backend and react-native-starter-ai-mobile folders.
1cp .env.example .env.localProject Structure
The structure of the React Native Starter AI project is built to be simple and easy to work with.
react-native-starter-mobile/screens → Screens of the mobile application
react-native-starter-mobile/components → Reusable React Native components
react-native-starter-mobile/services → HTTP call functions
react-native-starter-mobile/utils → Mobile app utility functions (e.g. In-App purchases, auth etc.)
react-native-starter-backend/functions/src/index.ts → Firebase API routes
react-native-starter-backend/functions/src/utils → Backend utility functions (e.g. building AI body, check subscription etc.)
react-native-starter-backend/functions/src/prompts → Prompts used for AI services integration
.env Files
.env file is used to store environment variables on both Firebase functions backend folder and mobile app folder. There is no need to fill all of the environment variables, only use the ones you need as you go.
Mobile App Environment Variables
1EXPO_PUBLIC_FIREBASE_ENDPOINT=http://localhost:5001/react-native-starter-ai/us-central1/
2EXPO_PUBLIC_REVENUECAT_APPLE_API_KEY=<REVENUE_CAT_APPLE_API_KEY>
3EXPO_PUBLIC_REVENUECAT_GOOGLE_API_KEY=<REVENUE_CAT_GOOGLE_API_KEY>
4EXPO_PUBLIC_ONESIGNAL_APP_ID=<ONESIGNAL_APP_ID>
EXPO_PUBLIC_FIREBASE_ENDPOINT will be localhost during the development environment but it will change when it comes to production.
EXPO_PUBLIC_REVENUECAT_APPLE_API_KEY and EXPO_PUBLIC_REVENUECAT_GOOGLE_API_KEY keys can be taken from your RevenueCat dashboard as explained in Apple In-App purchases docs of React Native Starter AI and Android In-App purchases docs of React Native Starter AI.
EXPO_PUBLIC_ONESIGNAL_APP_ID key can be taken from OneSignal dashboard as explained in Push Notifications docs of React Native Starter AI.
Firebase Functions Backend Environment Variables
1RUNPOD_TEXT_TO_IMAGE_ENDPOINT=
2RUNPOD_API_TOKEN=
3OPENAI_API_KEY=
4ONESIGNAL_APP_ID=
5ONESIGNAL_API_KEY=
AI service environment variables will be taken from OpenAI and RunPod but they will be covered in the AI Services docs.
ONESIGNAL_APP_ID and ONESIGNAL_API_KEY keys can also be taken from One Signal Dashboard as explained in Push Notifications docs
Setting Up Firebase
We need to have Firebase credentials JSON files on both backend and mobile app codes. To have them, we need to setup a new project on Firebase Console and get the credentials to get started!
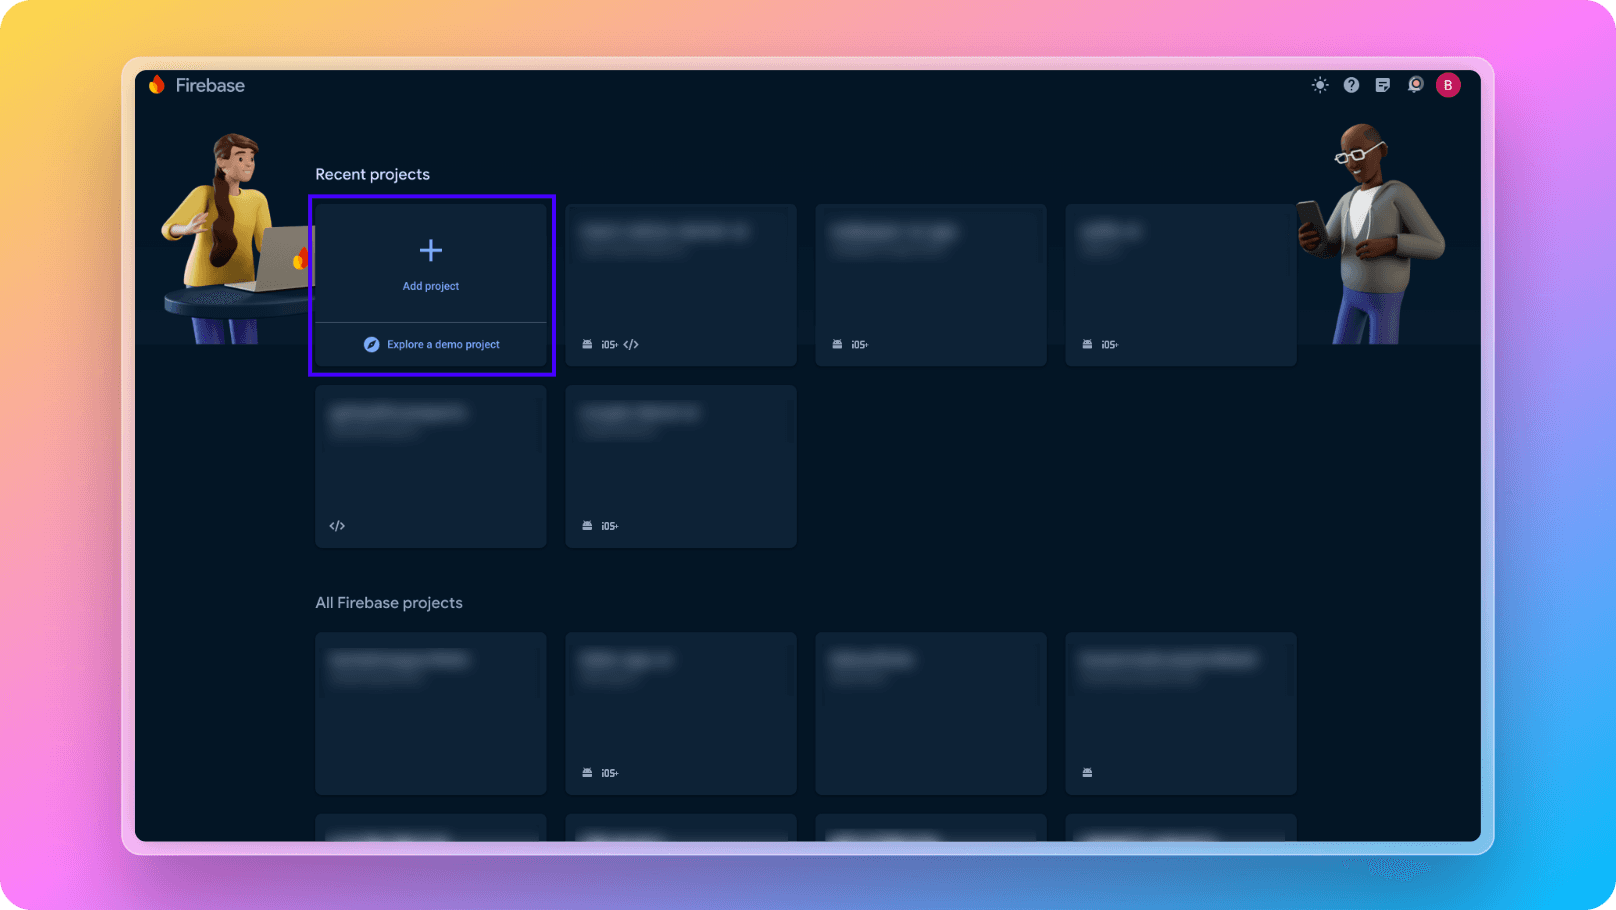
1. Go to Firebase Console and create a new project like below:
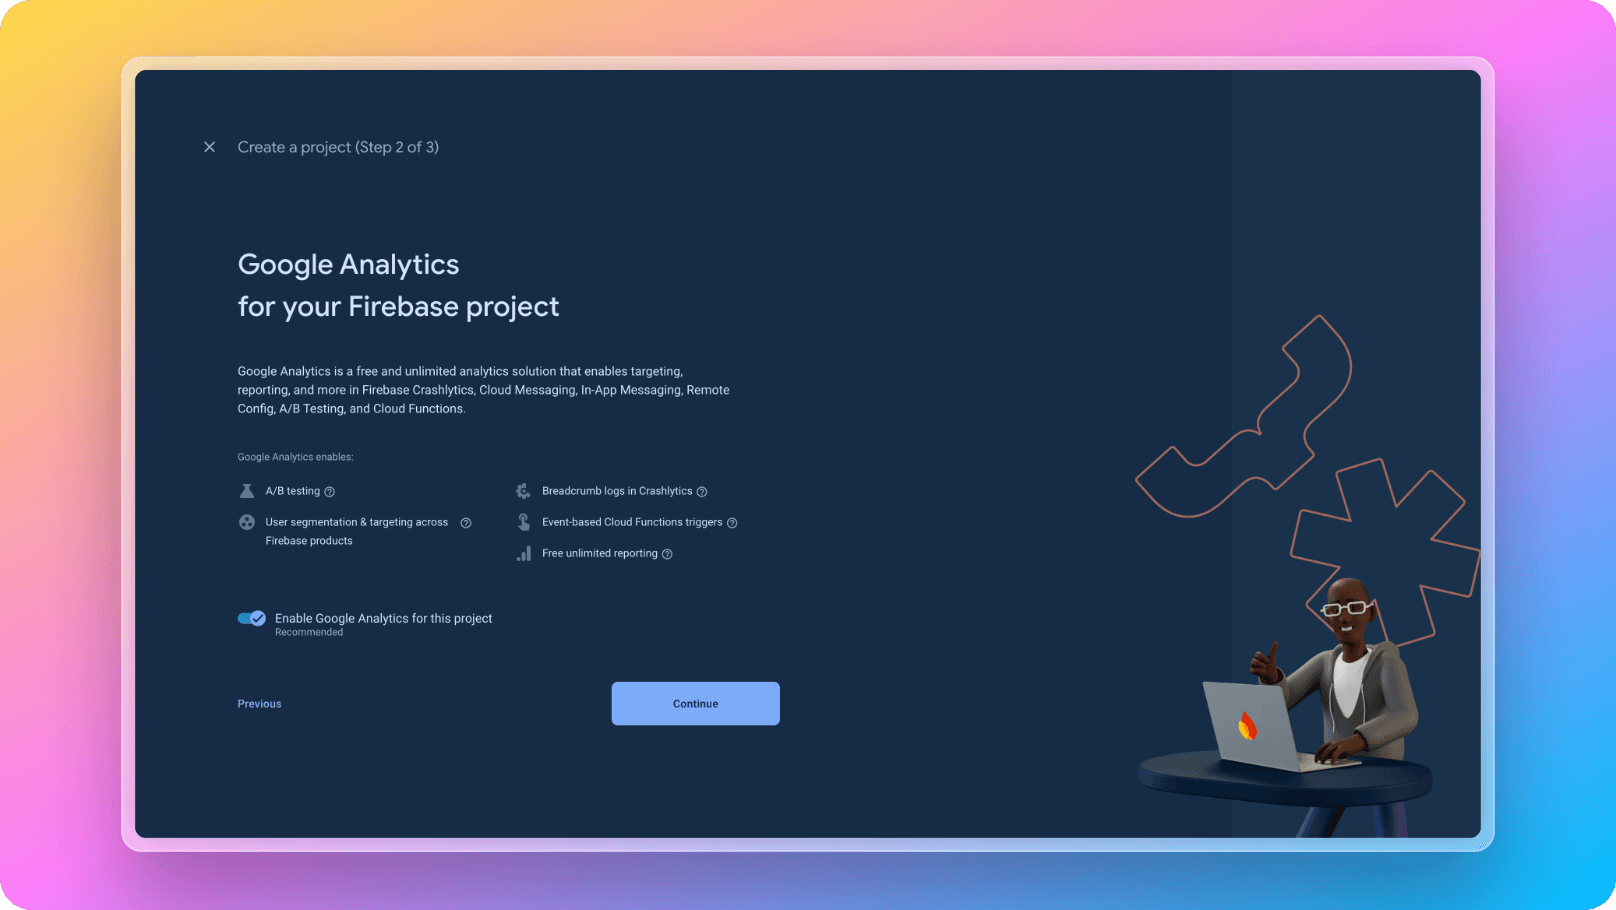
While creating your new Firebase Project, don't forget to enable analytics like below:
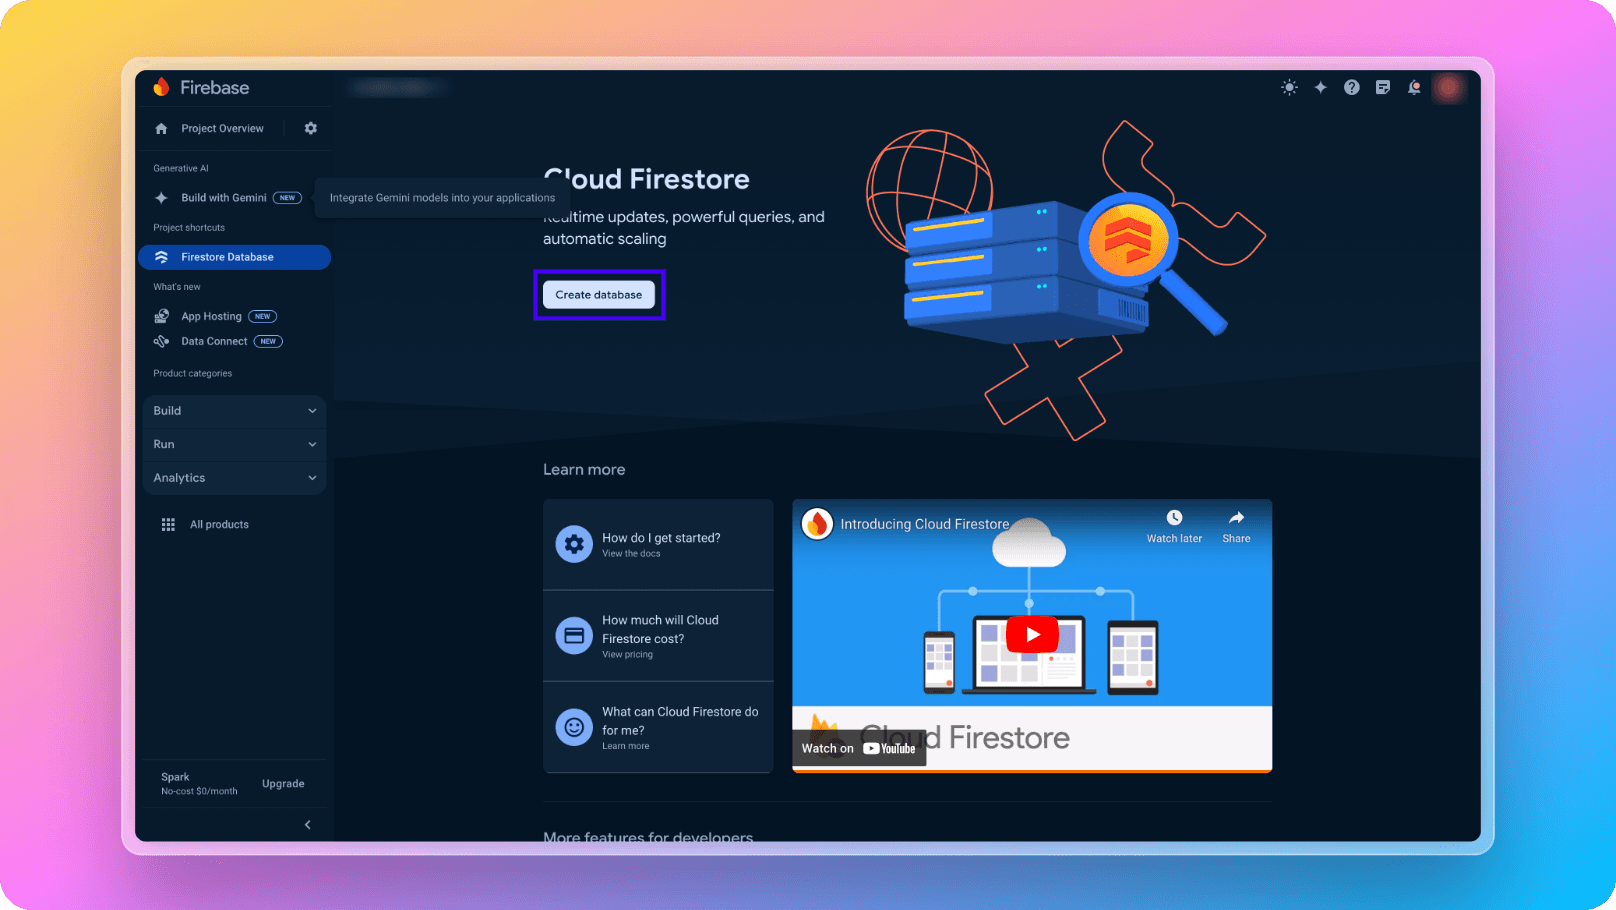
2. Enable Firebase Firestore like below:
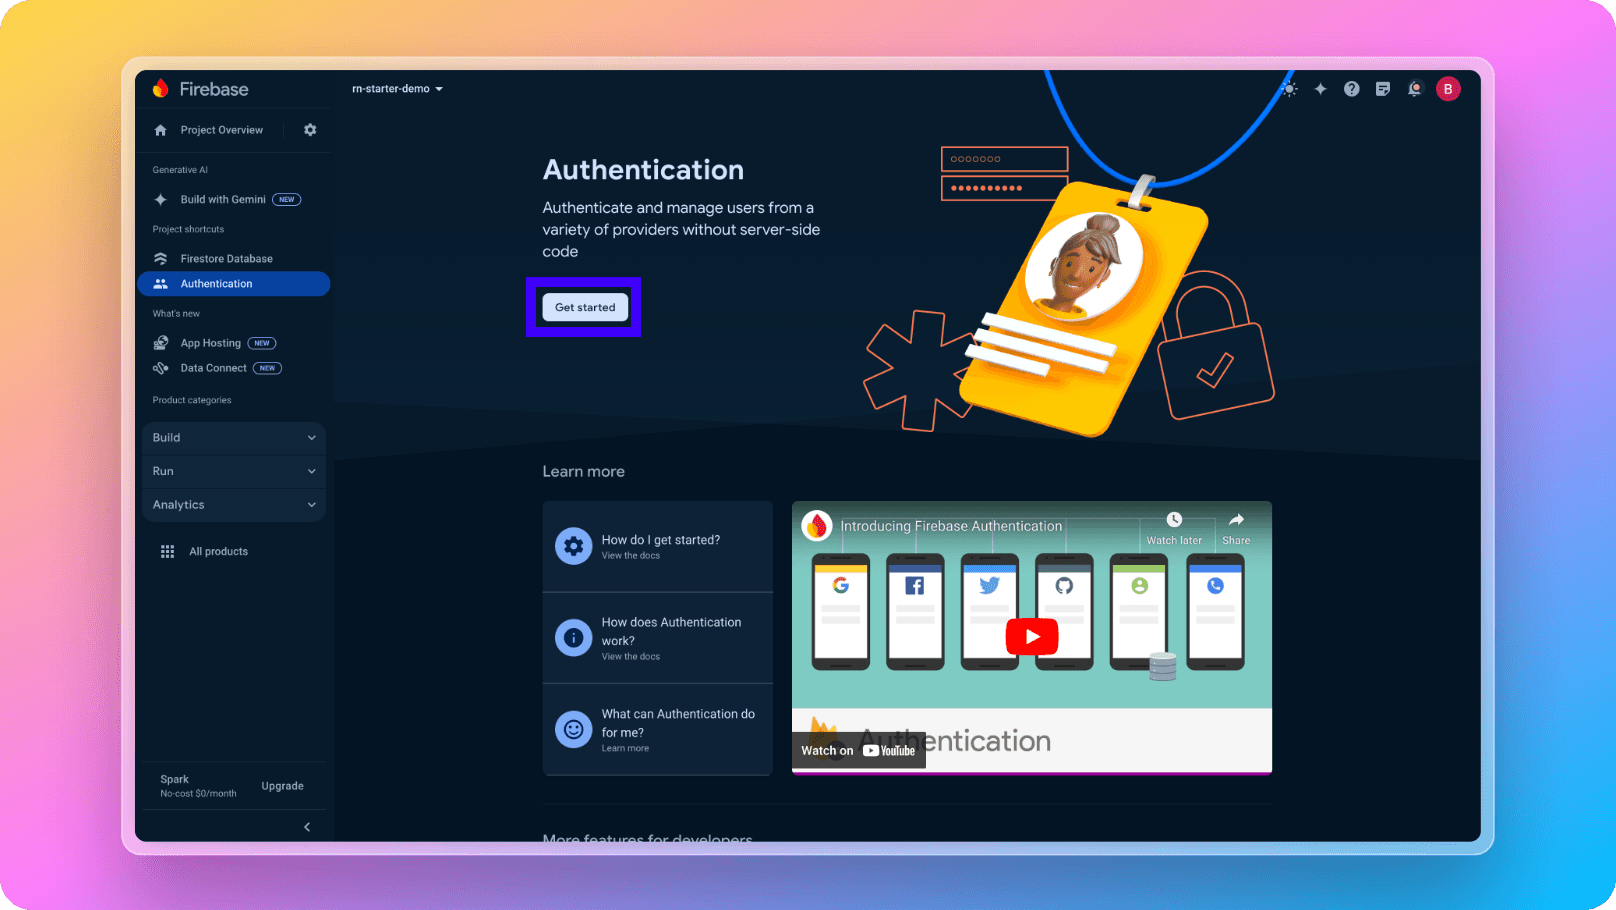
3. Enable Firebase Authentication like below:
4. Enable Firebase Functions after moving to Blaze plan on your Firebase project like below:
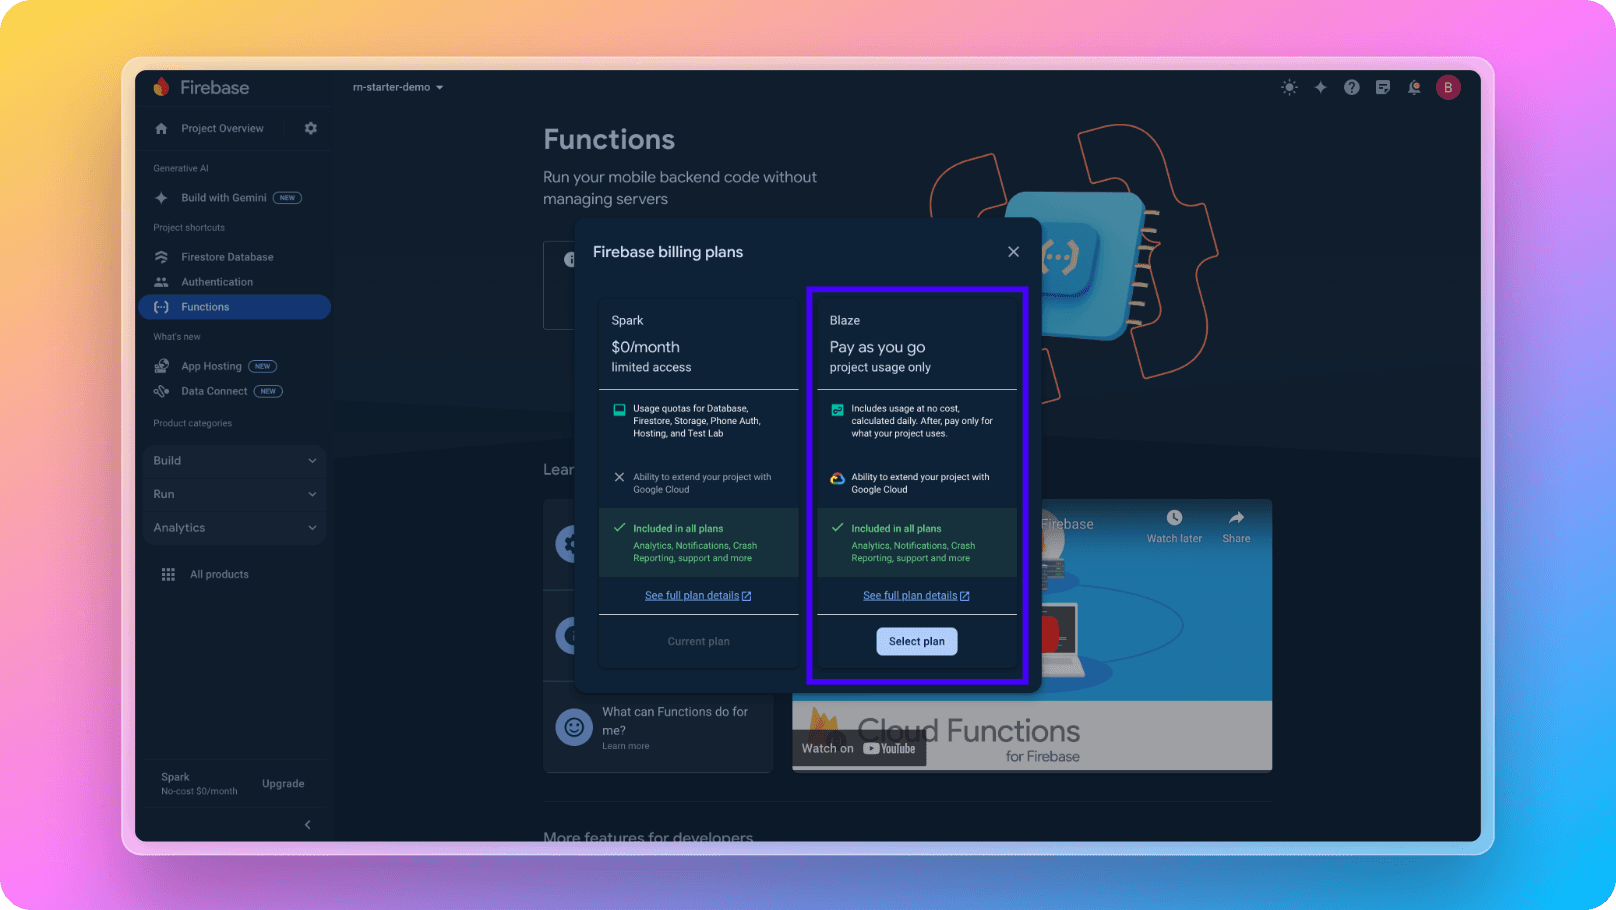
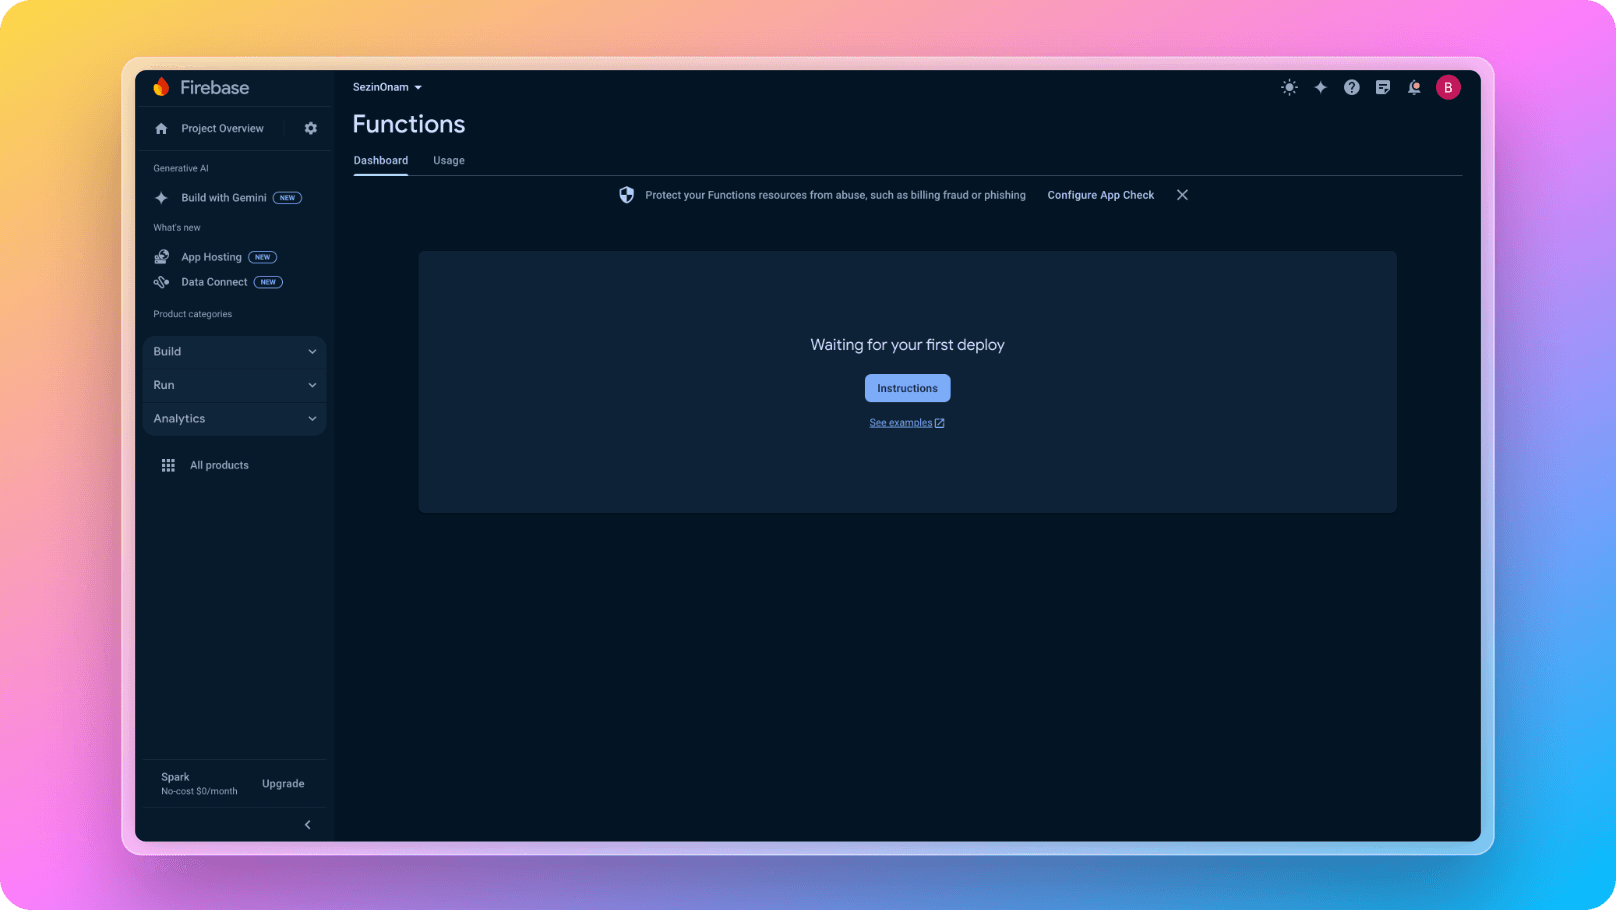
Locally we are going to emulate Firebase functions and you will run your API locally but this is needed for deploying your backend.
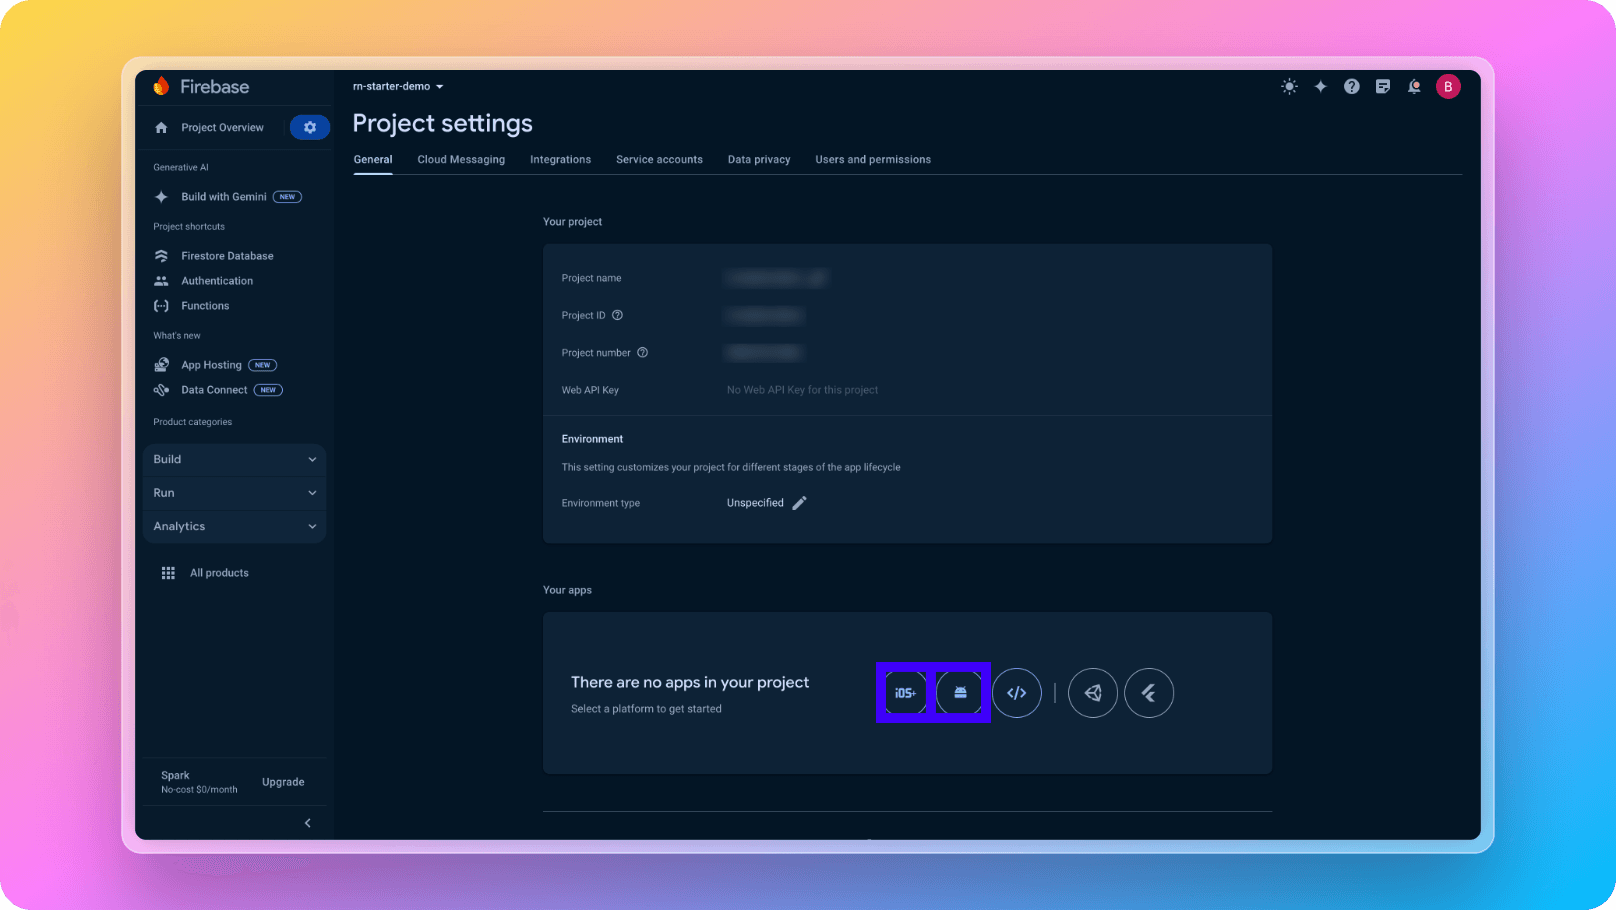
5. Now you are ready to download your Firebase credentials and add them to React Native Starter AI boilerplate. First, go to Project Settings Page and create a iOS and Android apps like below:
6. After you create both iOS and Android projects, you need to download google-services.json and GoogleService-Info.plist files like below:
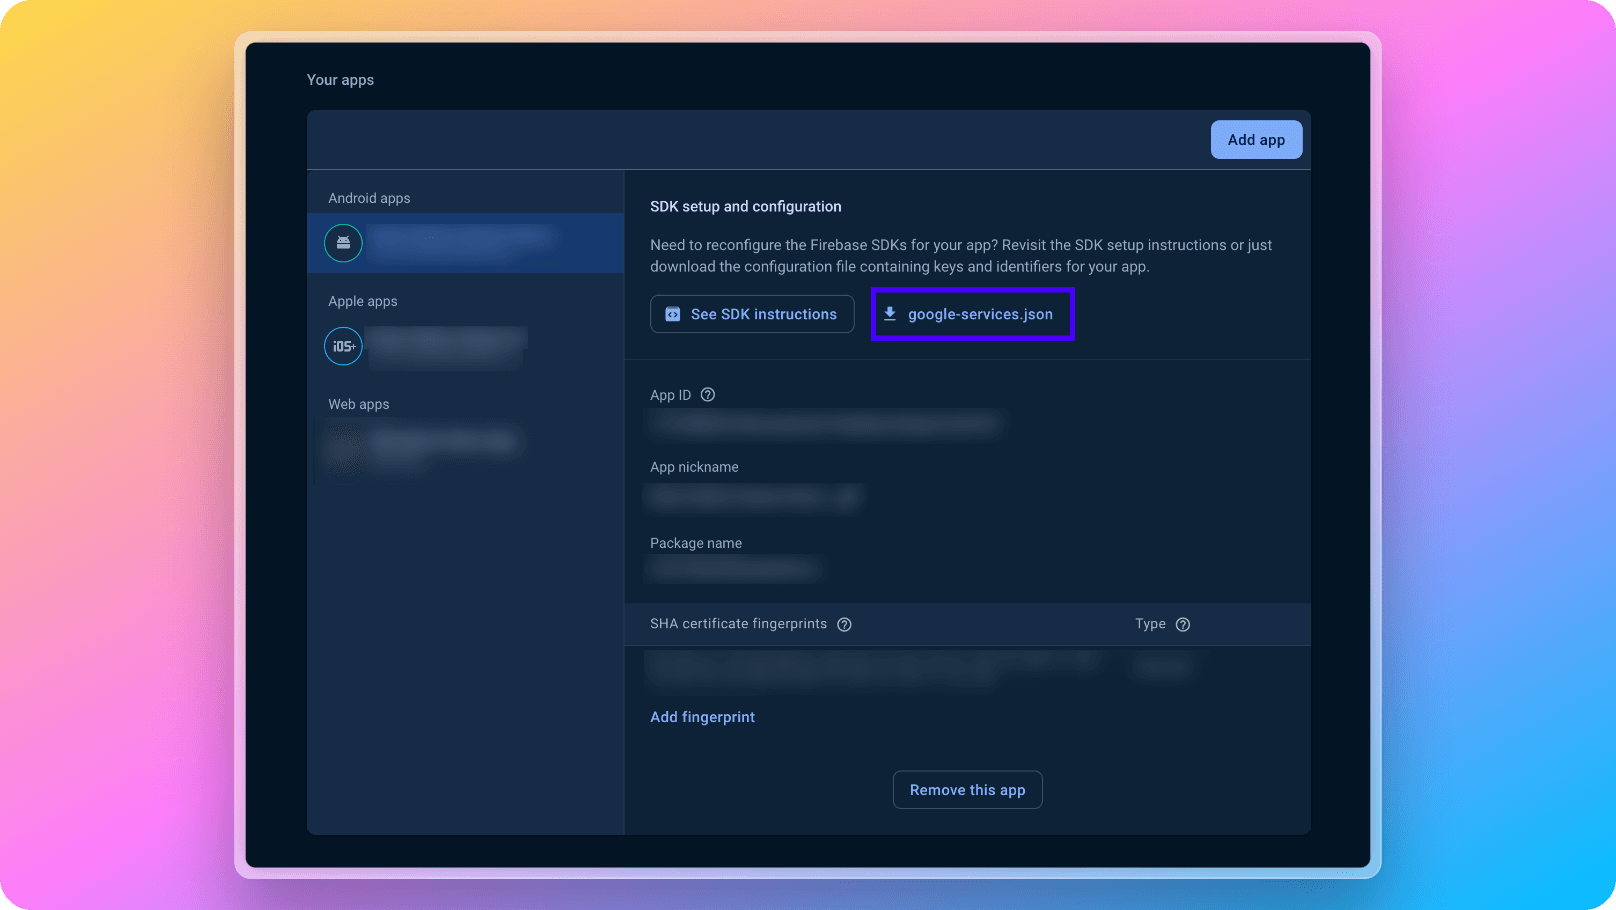
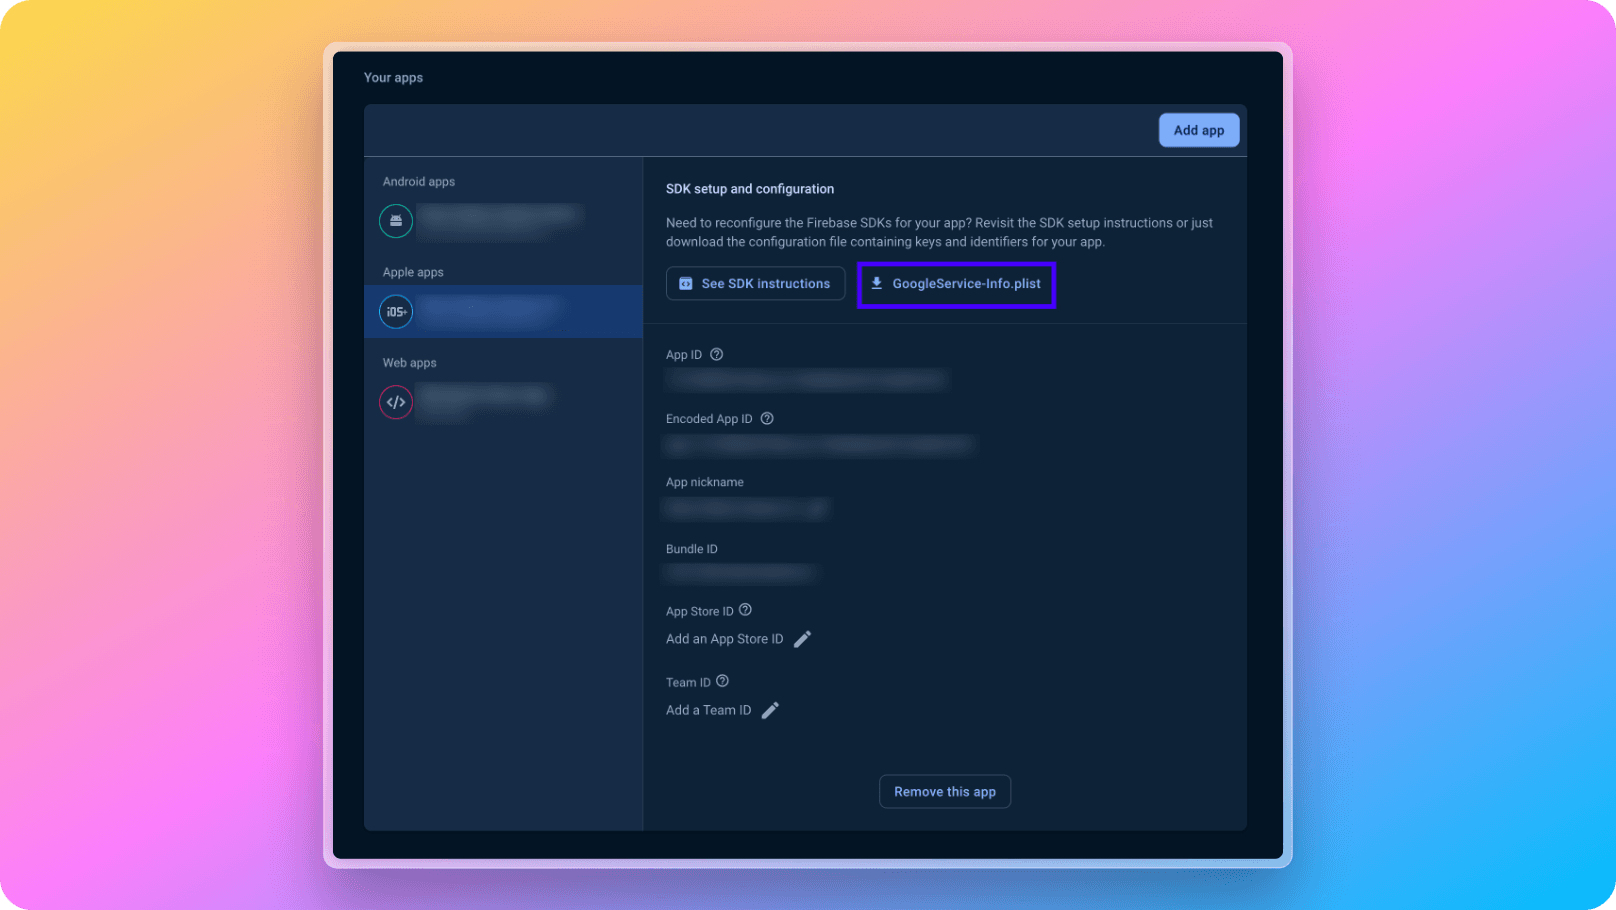
7. After you download both google-services.json and GoogleService-Info.plist files, just place them under react-native-starter-mobile/ folder and you are ready to go!
8. Now we are done with the mobile application part of Firebase. There is a tiny thing to setup Firebase on backend. We need to download Service Account credentials of our Firebase Project and place it into react-native-starter-backend/functions/src/credentials/
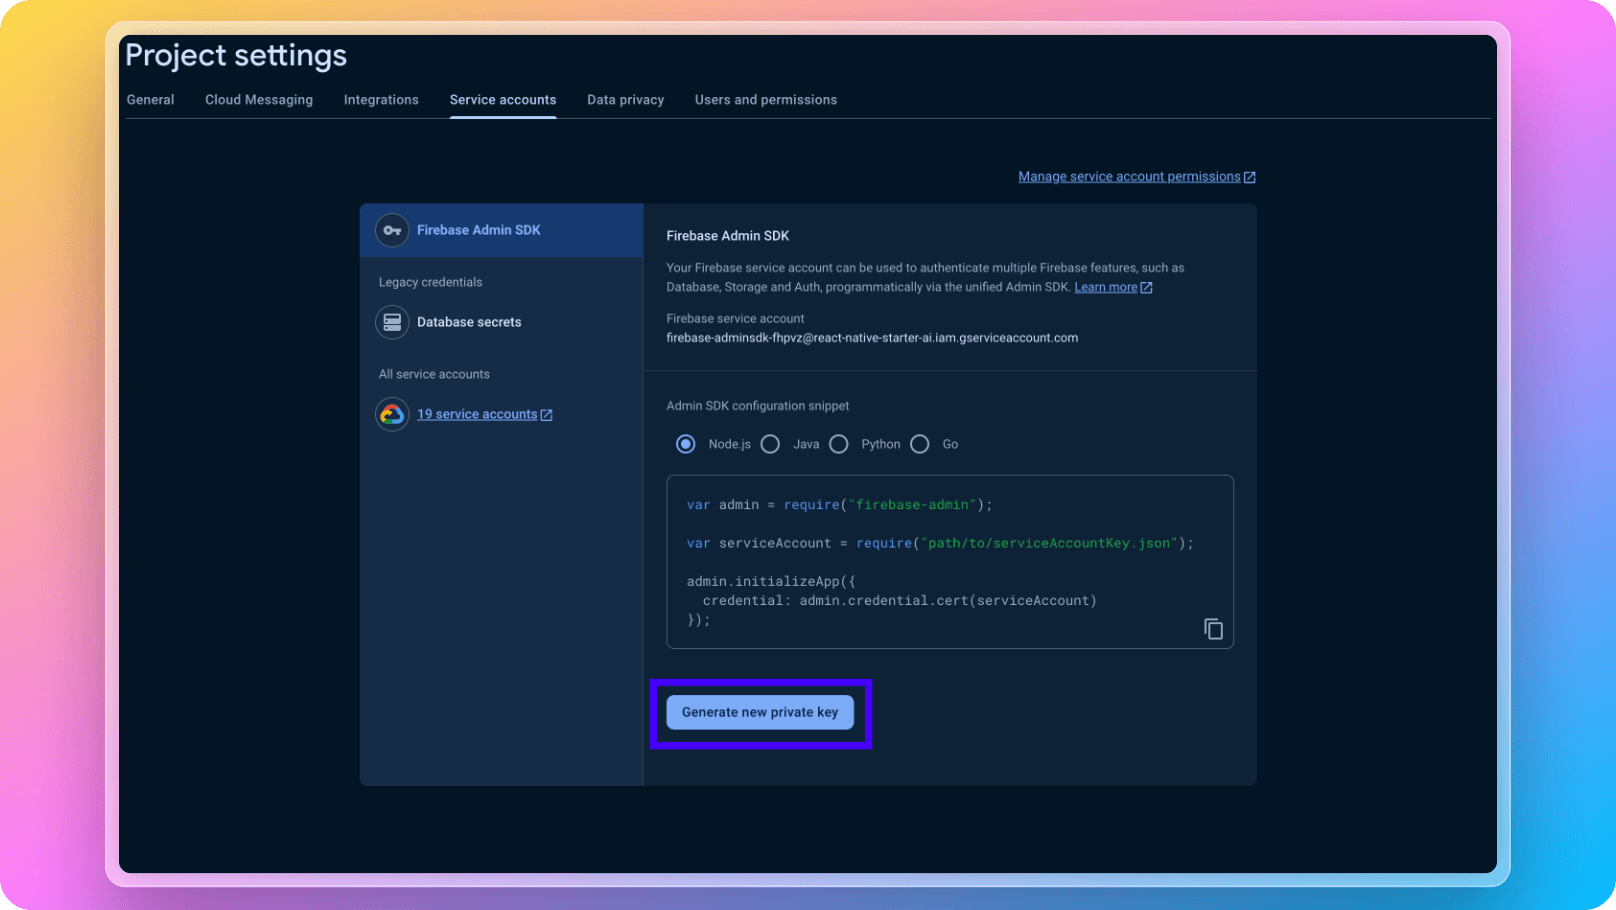
9. After you place service account JSON into react-native-starter-backend/functions/src/credentials/, you just need to go react-native-starter-backend/functions/src/index.ts and edit the import line of your service account with the name of your file like below:
1import * as sdkData from "./credentials/react-native-starter-ai-firebase-adminsdk.json";And also don't forget to update react-native-starter-backend/.firebaserc file with your project's name as below:
1{
2  "projects": {
3    "default": "react-native-starter-ai"
4  }
5}
9. Now you are all done. Happy coding!