Google Play Store Publishing
Congratulations on completing your mobile app project with React Native Starter AI and now it is time to publish your Android app on Google Play Store to reach out to your users globally! 🚀
Publishing Android apps to Google Play Store seem to be a bit easier compared to Apple Play Store but with mobile app publishing guide of React Native Starter AI, they are all easy! All the steps to be taken for publishing your Android app to Google Play Store are explained clearly below:
Building Your Application
1. Expo Application Services(EAS) is used for building your Android application on the Cloud in React Native Starter AI. It is pretty simple to use and easily configured. Also you don't need to worry about your local setup for building your app. Firstly, we are setting it up on our local environment with the following command:
1npm install -g eas-cli2. After EAS installation is complete, you need to sign in/up to Expo to be able to build your apps on Expo Cloud. Here, you can sign up on Expo
3. After signing up/in on Expo, you need to get authenticated on your terminal window locally by running the following command:
1eas login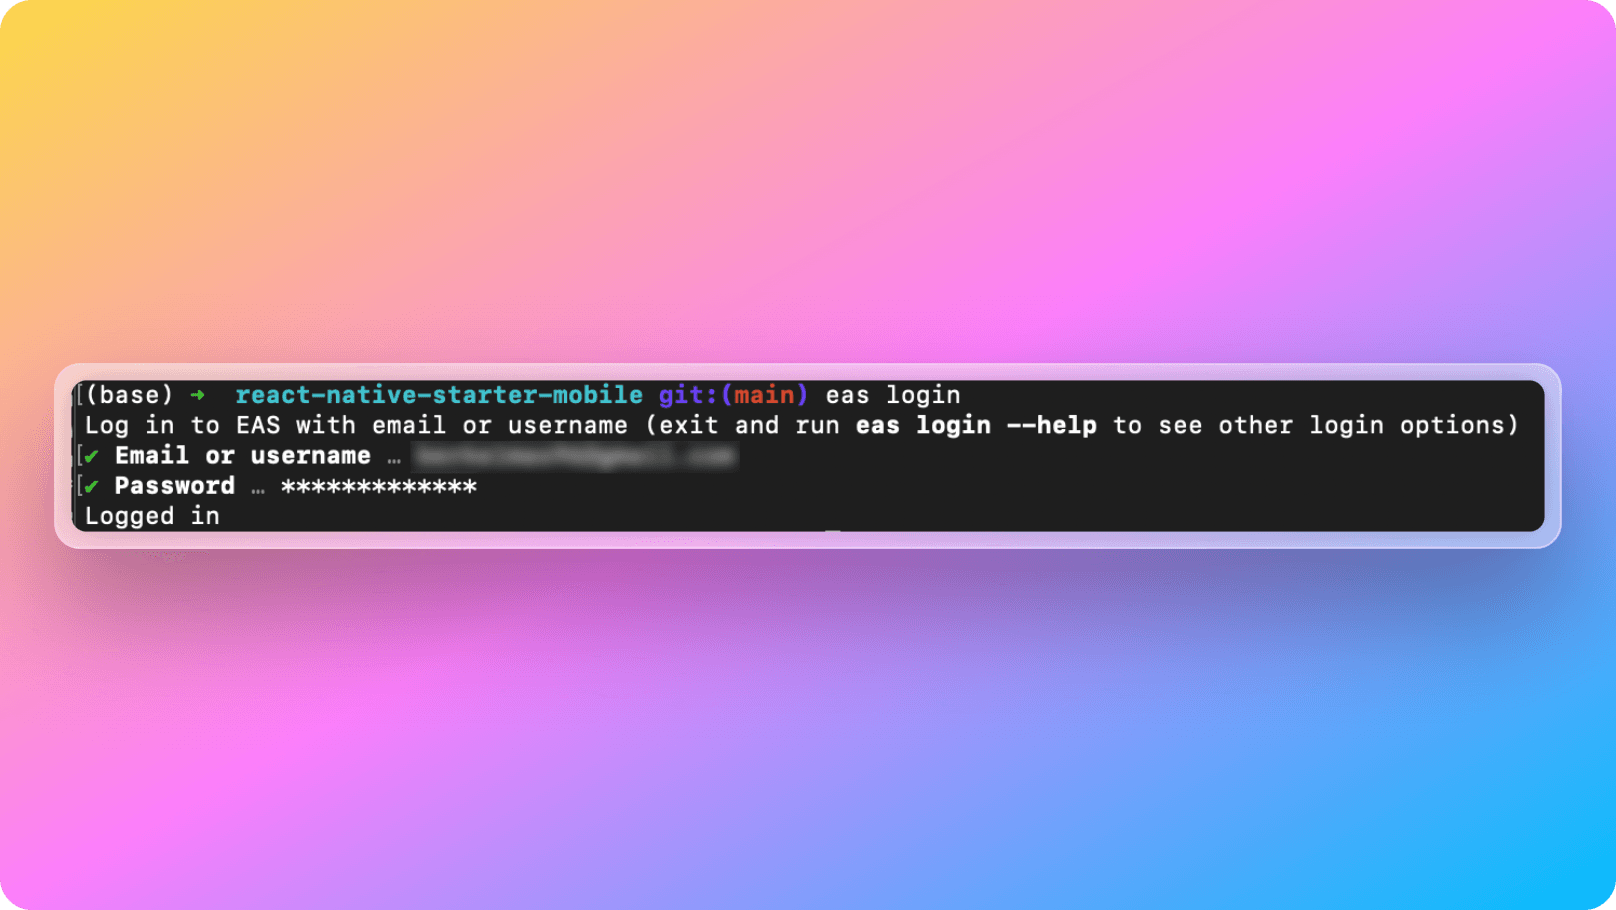
4. After logging in locally, we need to configure EAS on your project with the following command. This command is for generating eas.json file in your project's root directory. react-native-starter-mobile/eas.json
1eas build:configure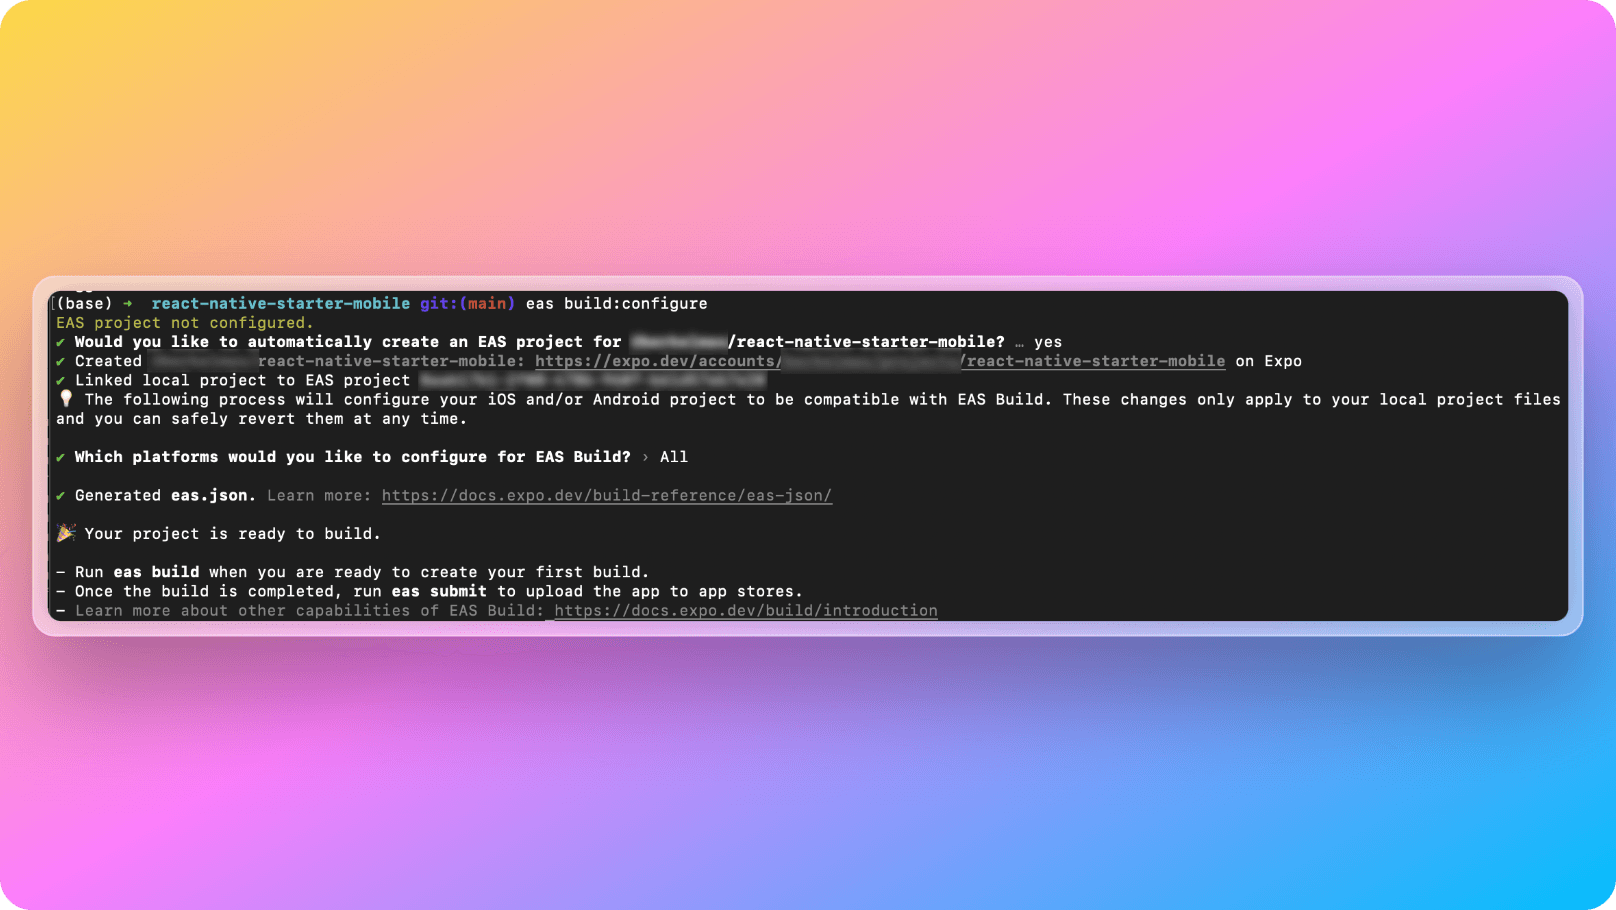
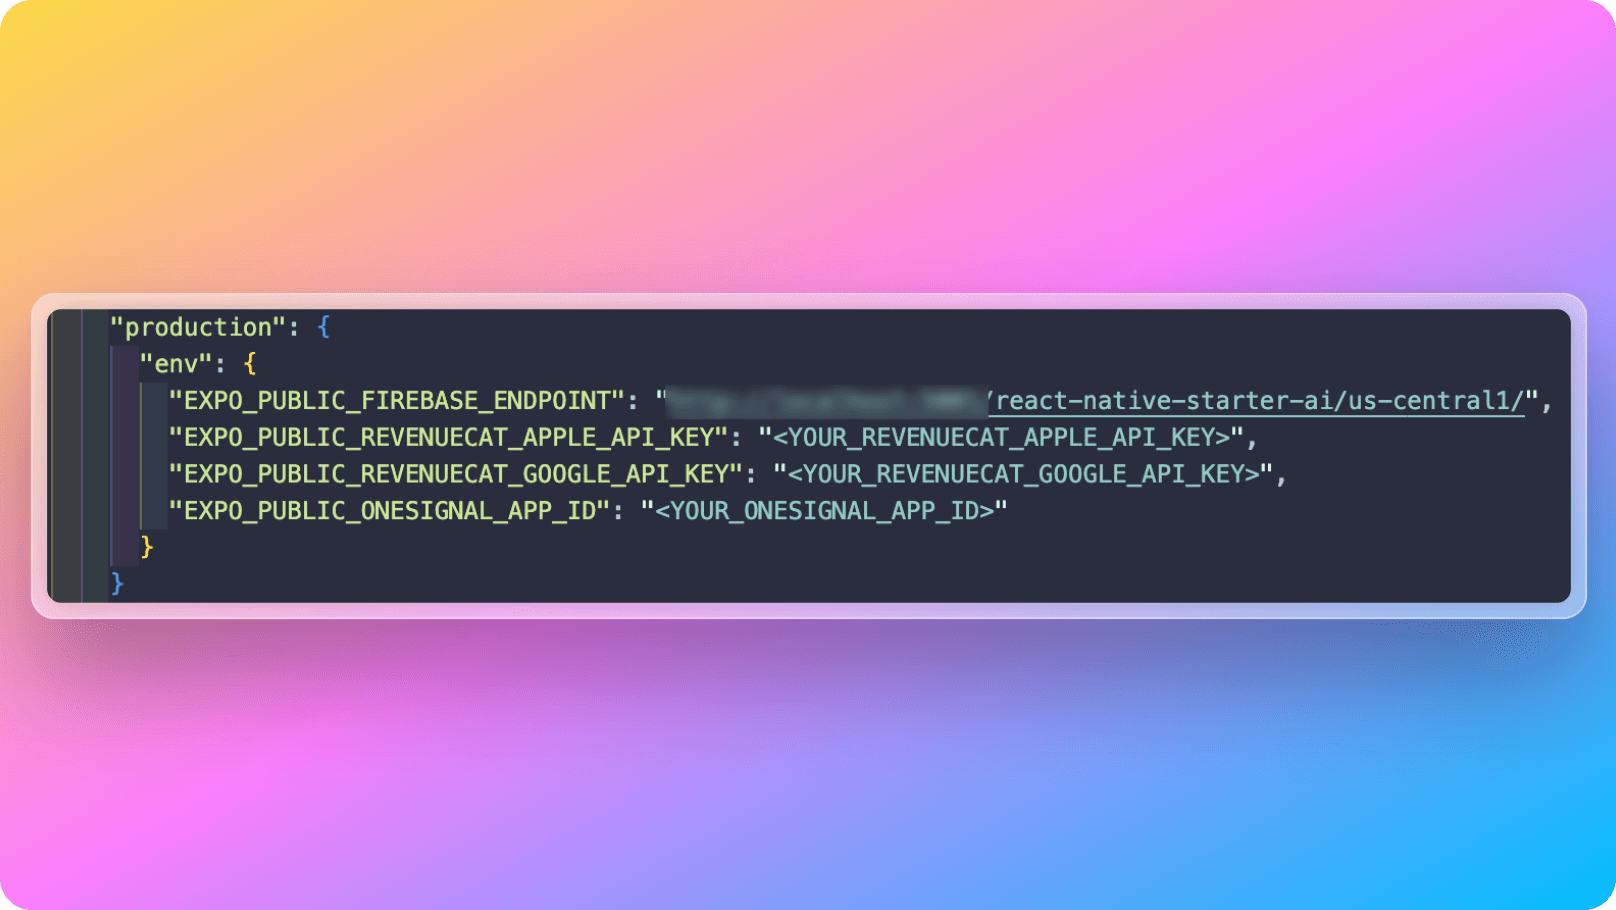
5. After running the configuration command above, you will see a new file generated on your project directory at react-native-starter-mobile/eas.json. We will add our production environment variables to it that as below: (These environment variables come with React Native Starter AI, you can add new ones if you need on your project for sure!)
1  "...build": {
2  "development": {
3    "developmentClient": true,
4    "distribution": "internal"
5  },
6  "preview": {
7    "distribution": "internal"
8  },
9  "production": {
10    "env": {
11      "EXPO_PUBLIC_FIREBASE_ENDPOINT": "http://localhost:5001/react-native-starter-ai/us-central1/",
12      "EXPO_PUBLIC_REVENUECAT_APPLE_API_KEY": "<YOUR_REVENUECAT_APPLE_API_KEY",
13      "EXPO_PUBLIC_REVENUECAT_GOOGLE_API_KEY": "<YOUR_REVENUECAT_GOOGLE_API_KEY>",
14      "EXPO_PUBLIC_ONESIGNAL_APP_ID": "<YOUR_ONESIGNAL_APP_ID>"
15    }
16  }
17},
18...
6. After adding your production environment variables, now you are all set to trigger the Android build on the EAS cloud with the command below:
1eas build --platform android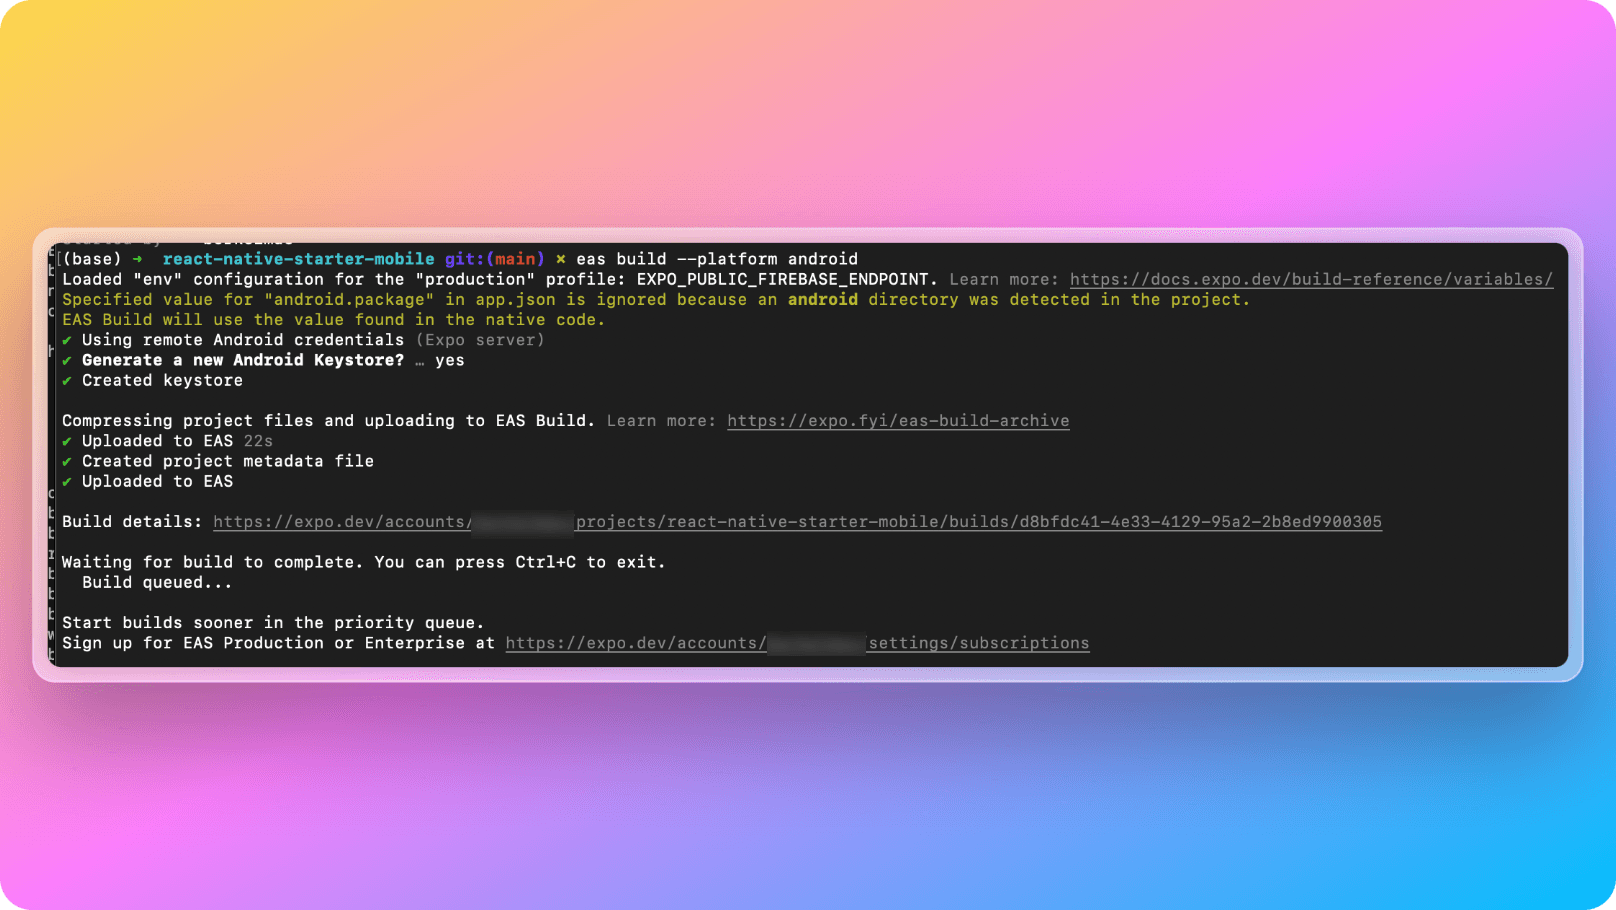
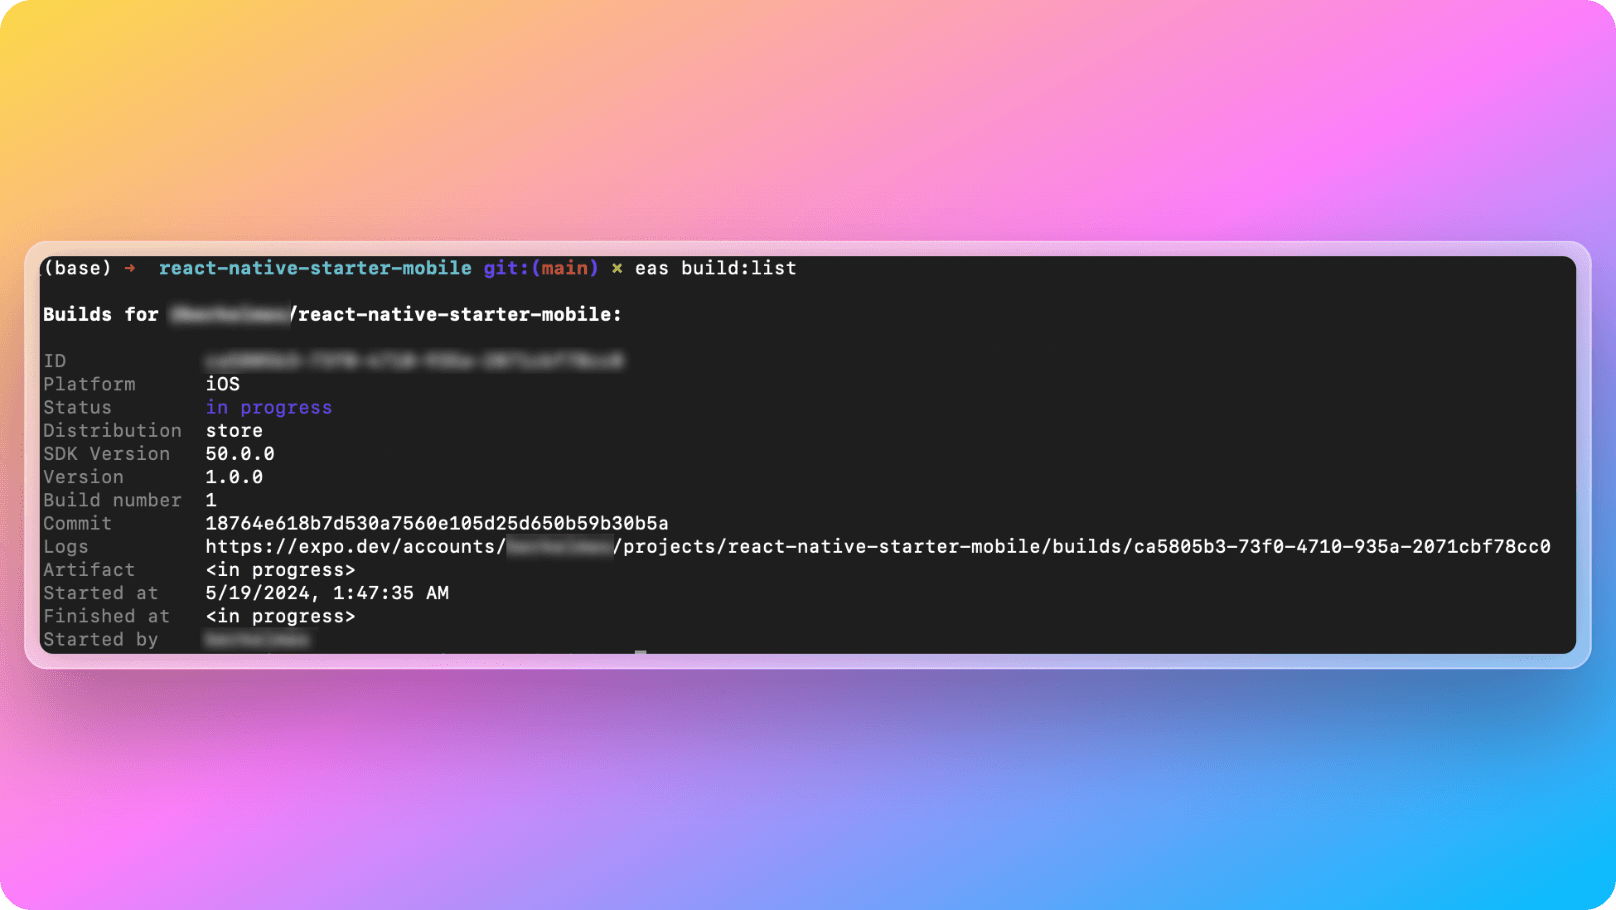
After running the build command above, the build process starts on the cloud. You don't need to wait looking at the terminal screen; you can close it and then check the status of the build with the command below:
1eas build:listThe output of the build list of EAS command will look like below:
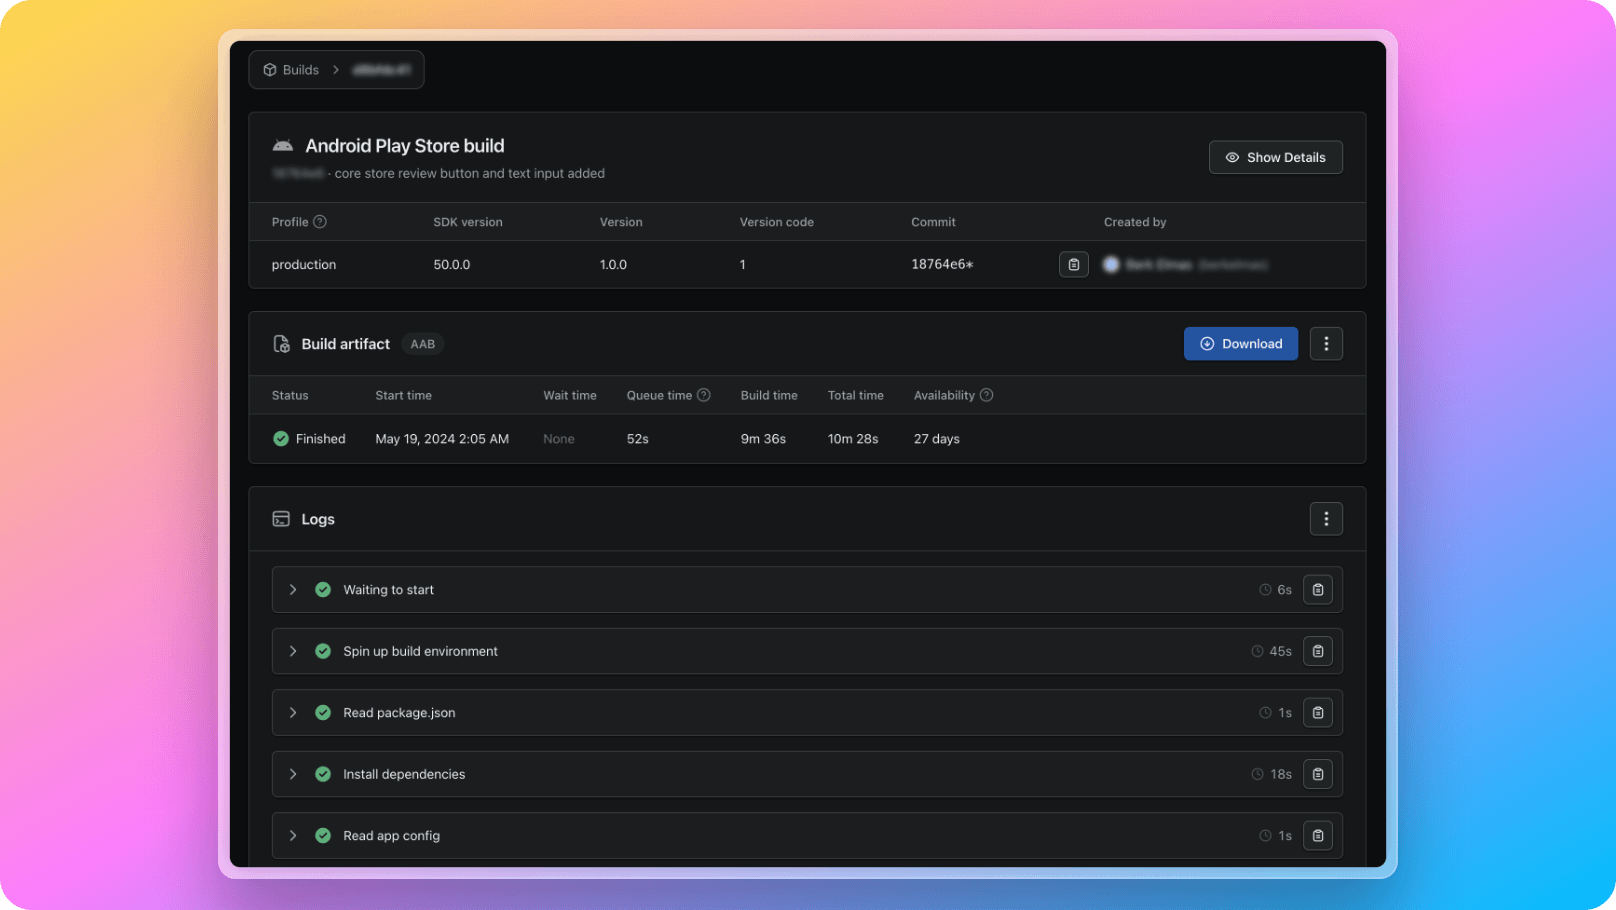
7. After you see finished as the output of eas build:list command, you will be able to see your built AAB file on Expo Dasboard like below:
After you see the output, all you need to do is to download your AAB file by clicking on the download button as shown below:
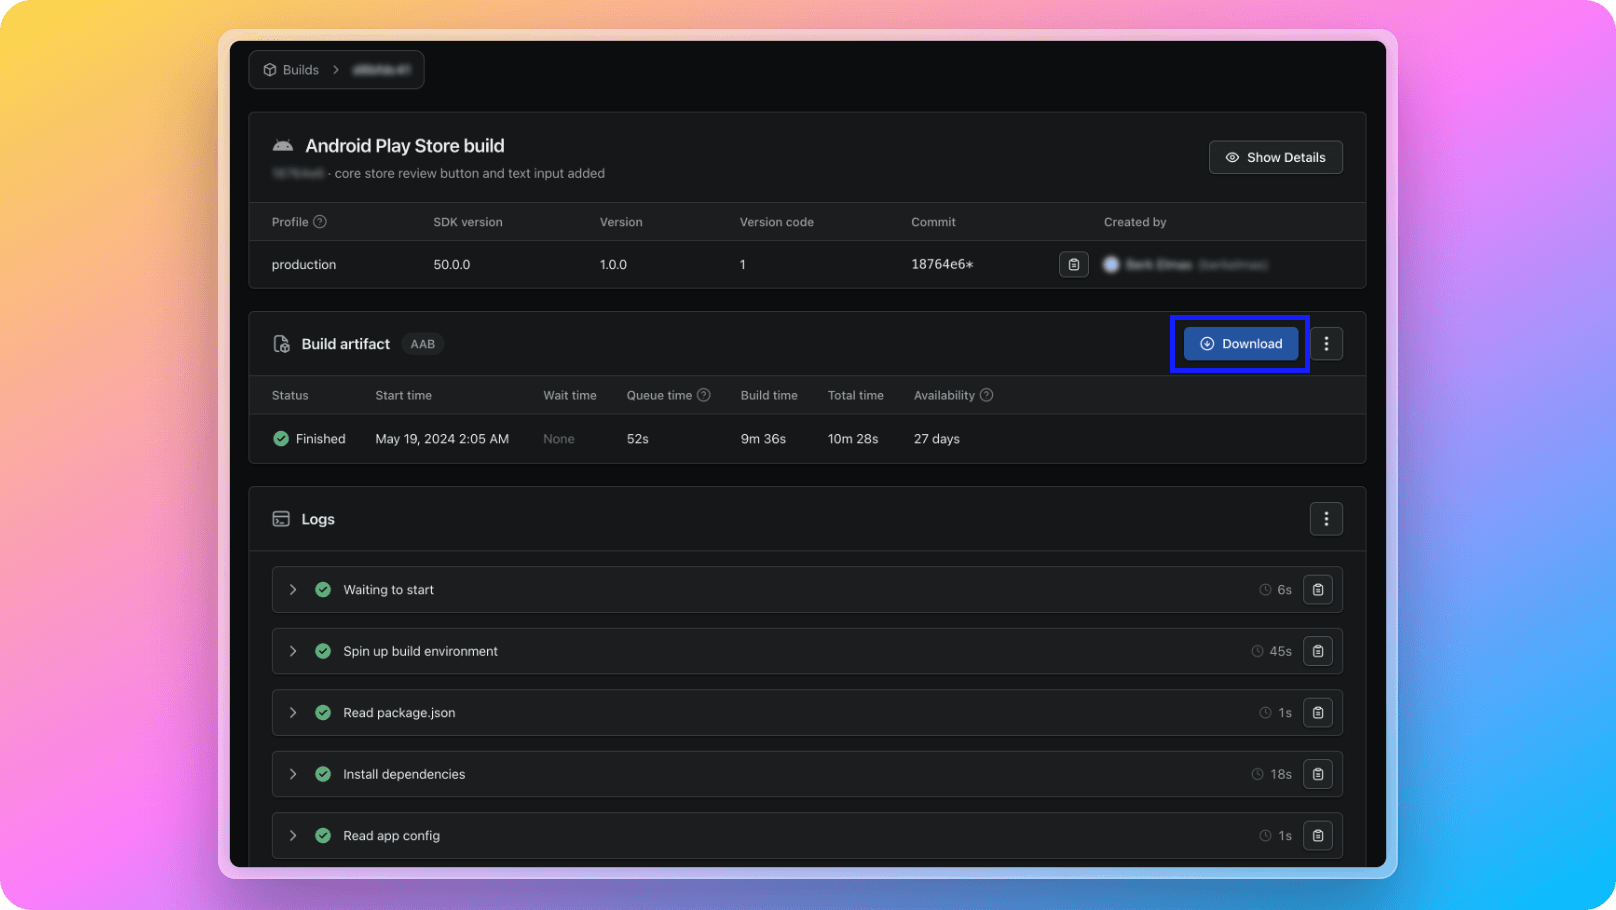
After downloading your AAB file, you can now proceed to Google Play Console to submit your app!
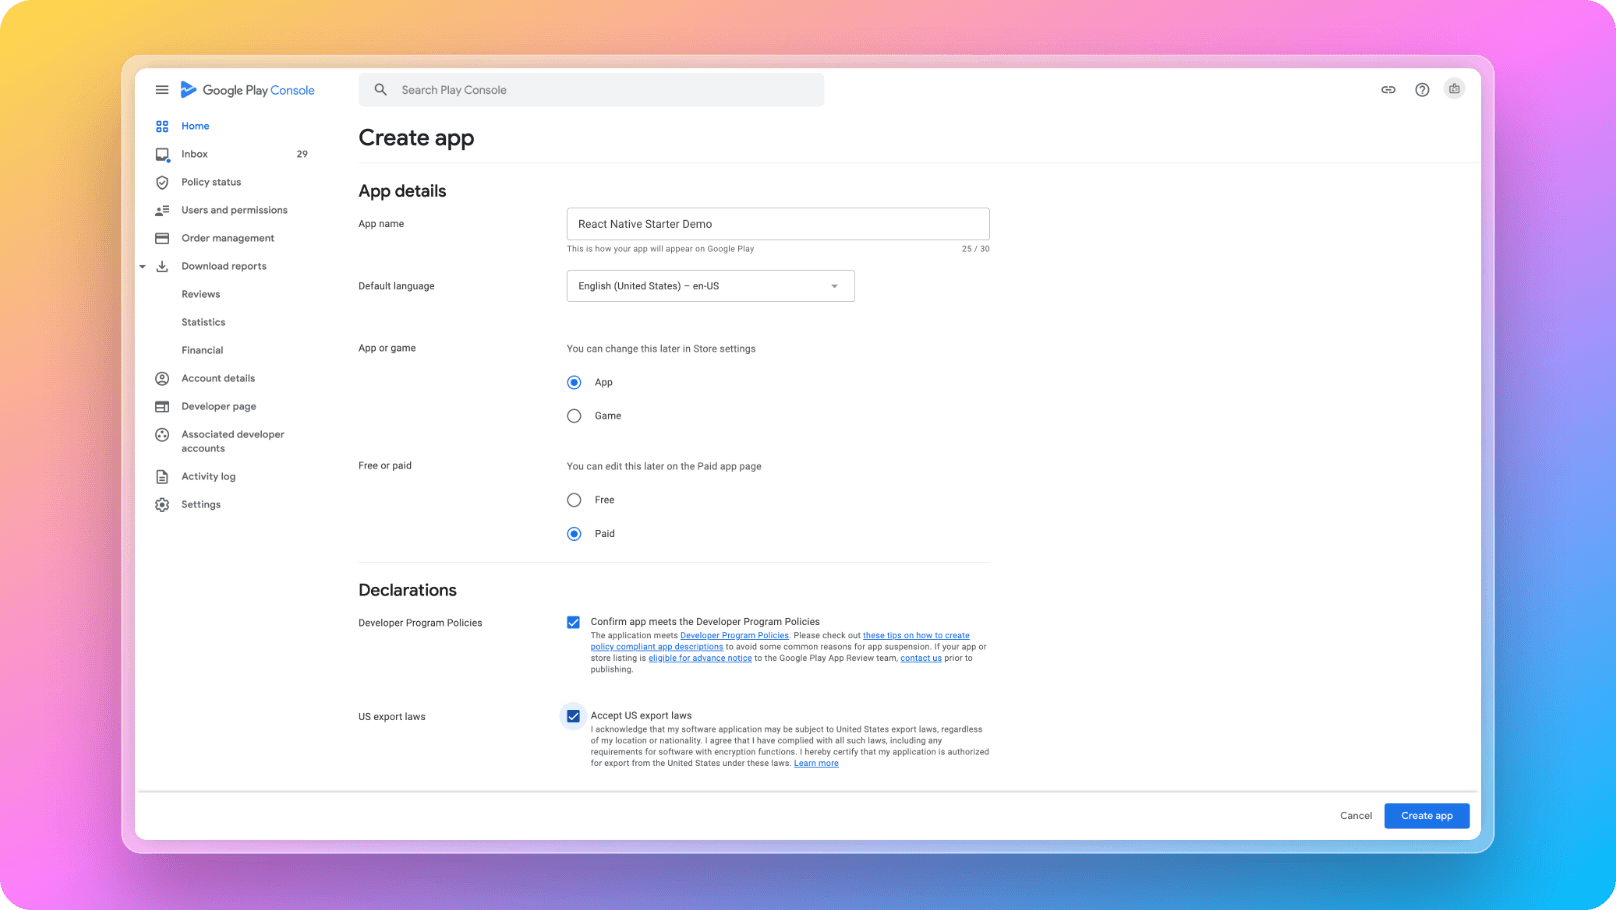
In Google Play Console, you will need to create a new application like below:
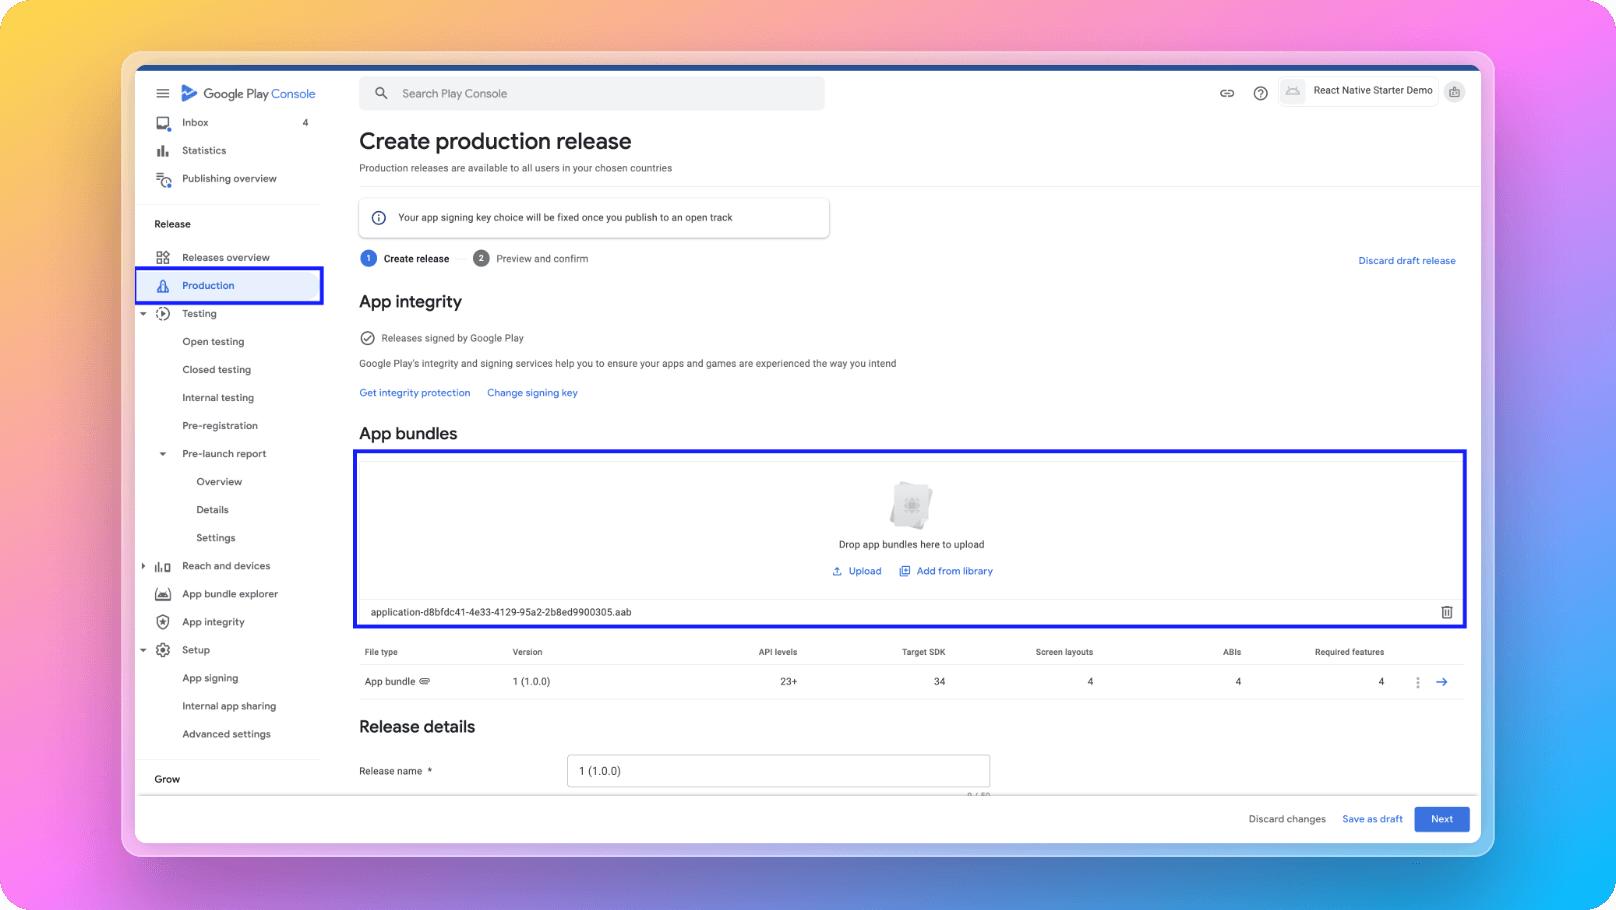
8. After you create your application, now it is time to upload your AAB file to Google Play Console.
9. Now it is time to fill out the title, description and other Google Play Store App page fields taking the App Store Optimization(ASO) docs of React Native Starter AI into account.
In App Purchases
When submitting your app, remember to include your in-app purchase items for review along with the app itself. For more details, you can refer to the In-App Purchases documentation of React Native Starter AI.