Tutorials > AI Services
React Native Starter AI comes with many AI services already integrated into the mobile app UI such as OpenAI ChatGpt, OpenAI Vision API and RunPod Serverless Stable Diffusion
With React Native Starter AI, we are already providing you with a beautifully designed mobile app UI with working AI functionality with different flows as AI Chatbot Flow, Text to Image AI Generation, Image to Text AI Generation and Image to Image AI Generation flows.
Deploying your own custom models
You don't need your own custom models to start. If your project can work without them, just use the ready-made models from RunPod or OpenAI.Basically, you just need custom endpoints to send requests to your models. Just get your model's endpoint URL using one of these services.
OpenAI ChatGPT
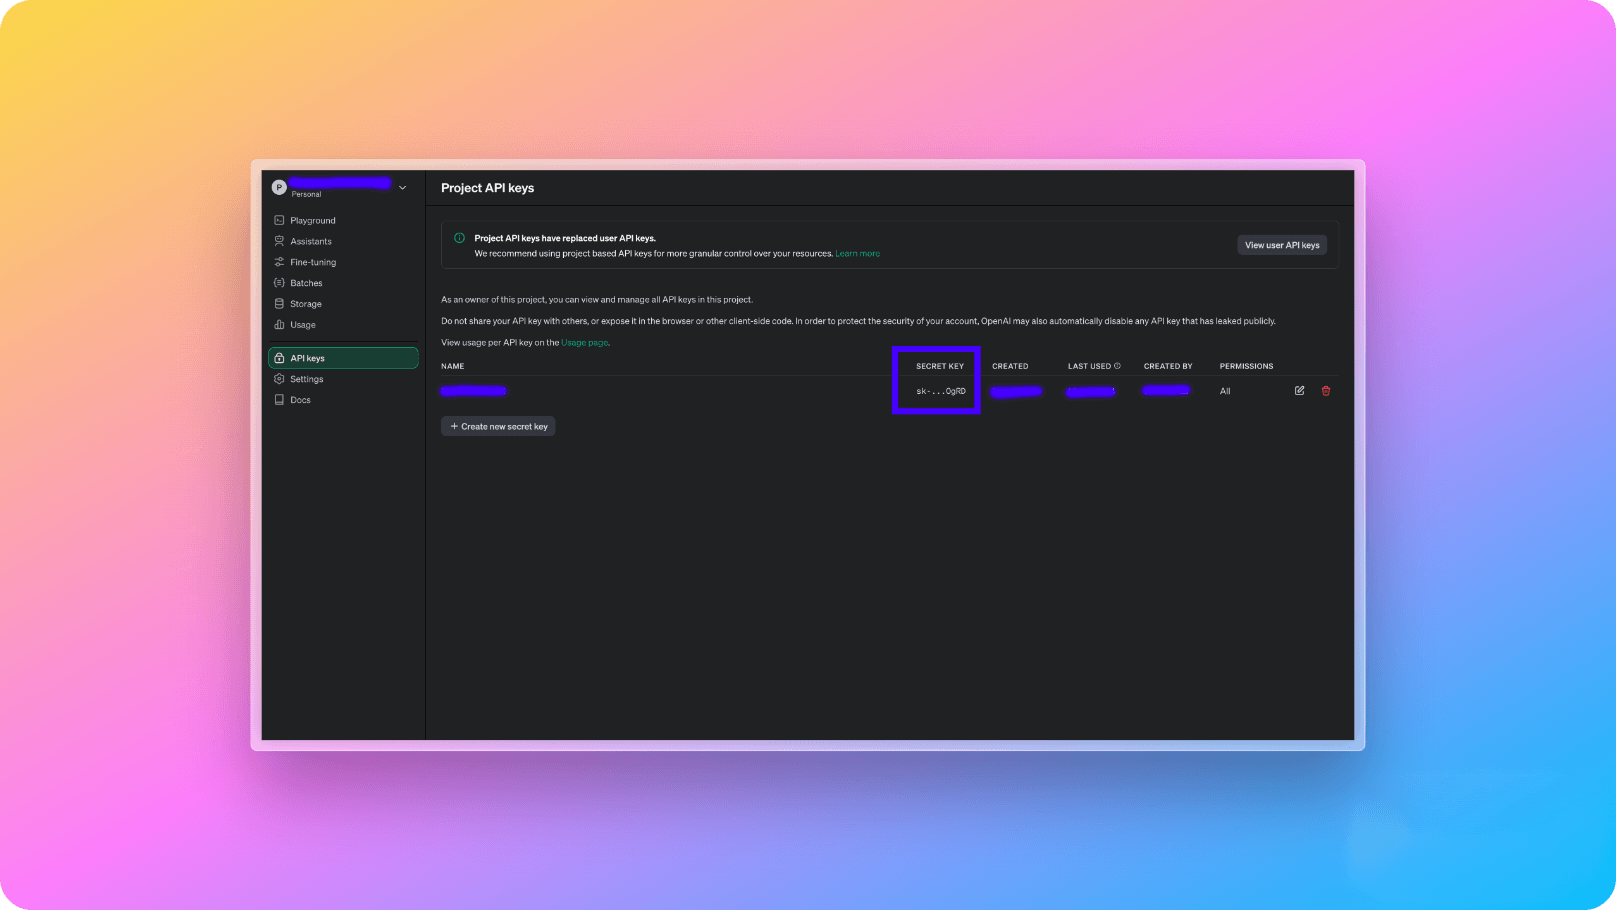
To get started with OpenAI ChatGPT, you need to grab your OpenAI API token from OpenAI dashboard like below from OpenAI Dashboard :
Usage
OpenAI ChatGpt is being used on both AI Chatbot Flow and Image to Text AI Generation flows under the hood.AI Chatbot Flow
AI Chatbot flow uses ChatGPT for getting back AI responses depending on the needs of your mobile application. With the default setup, we set things up as if the chat assistant is an expert dietician. You can change this logic through react-native-starter-backend/functions/src/prompts folder according to your application's logic.
There are two Firebase endpoints created to run this logic on Chatbot flow. 1. initializeChatContent and getChatReply API endpoints. Basically, they implement the core logic like below:
1const openai = new OpenAI({
2    apiKey: process.env.OPENAI_API_KEY,
3  });
4
5  const messages = [
6    { role: "system", content: chatInitialSystemPrompt },
7    { role: "user", content: chatInitialPromptToCreateWelcome(userInfo) },
8  ];
9
10  const chatResponse = await openai.chat.completions.create({
11    model: "gpt-4-turbo",
12    messages: messages as any,
13 });1const messages = chatData?.conversation
2 ?.sort(
3 (chatItemA, chatItemB) =>
4 (chatItemA?.date as any).toDate().getTime() -
5 (chatItemB?.date as any).toDate().getTime()
6 )
7 ?.map((chatItem) => ({
8 role: chatItem?.role === "assistant" ? "system" : "user",
9 content: chatItem.message,
10 }))
11 .concat([
12 {
13 role: "user",
14 content:
15 "and while answering my message, please note that you are a certified dietician and have warm voice.",
16 },
17 ]);
18
19const chatResponse = await openai.chat.completions.create({
20 model: "gpt-3.5-turbo-0613",
21 messages: messages as any,
22});RunPod - Stable Diffusion
1. Create a new account on RunPod.
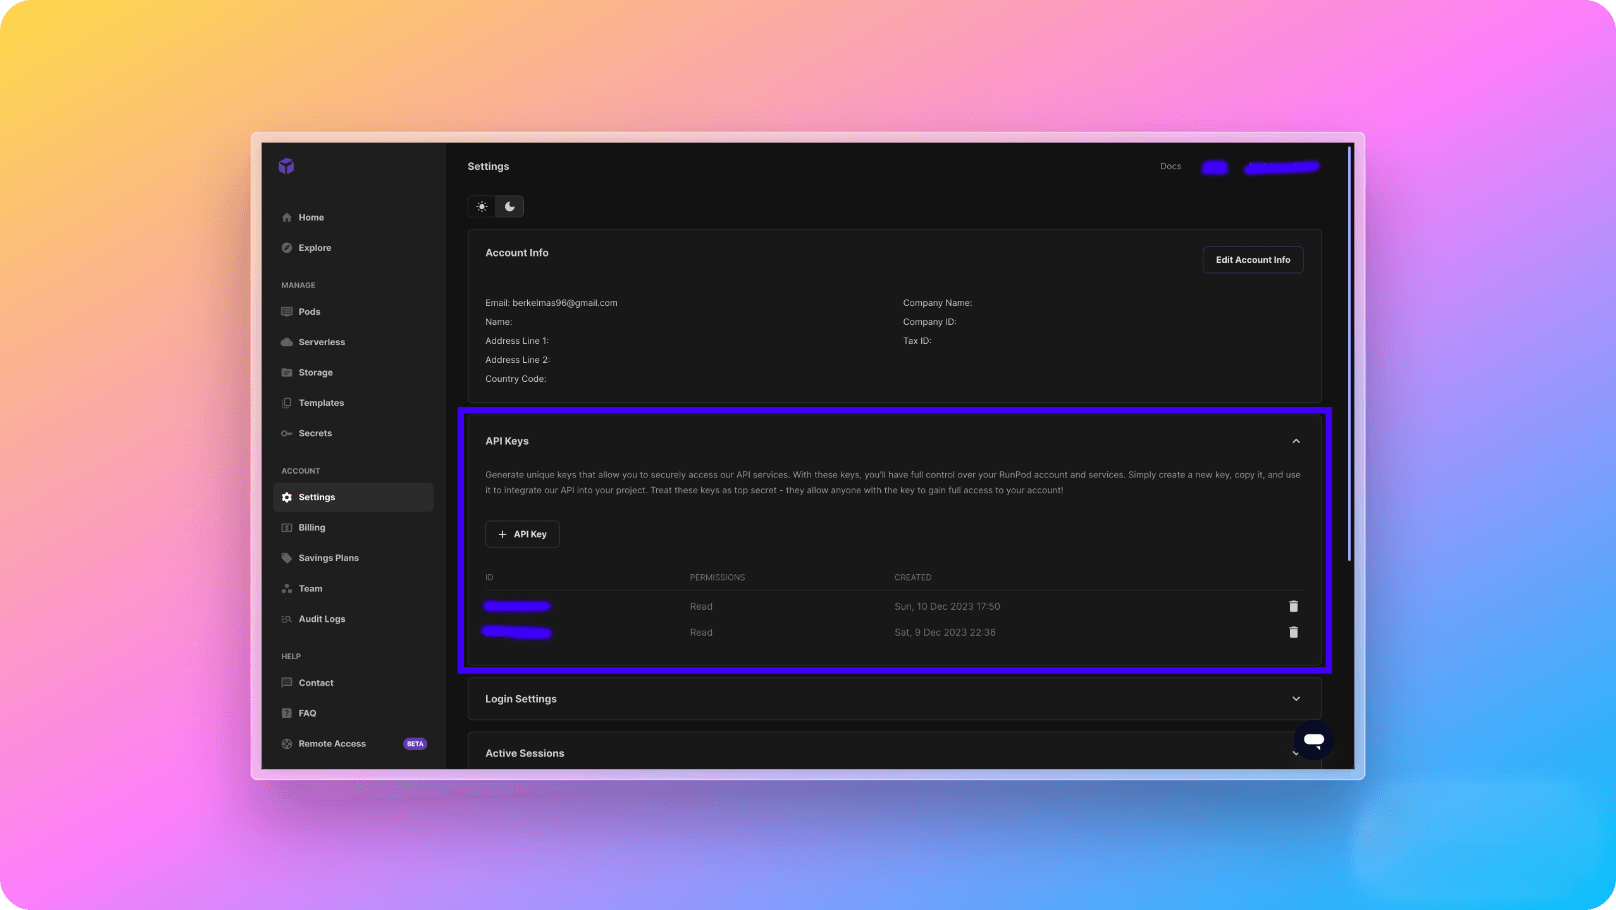
2. After creating your account, go to RunPod settings page and from API Keys section, create a new API key to be able to consume your AI API like below and add it to your react-native-starter-backend/functions/.env.local file's RUNPOD_API_TOKEN variable:
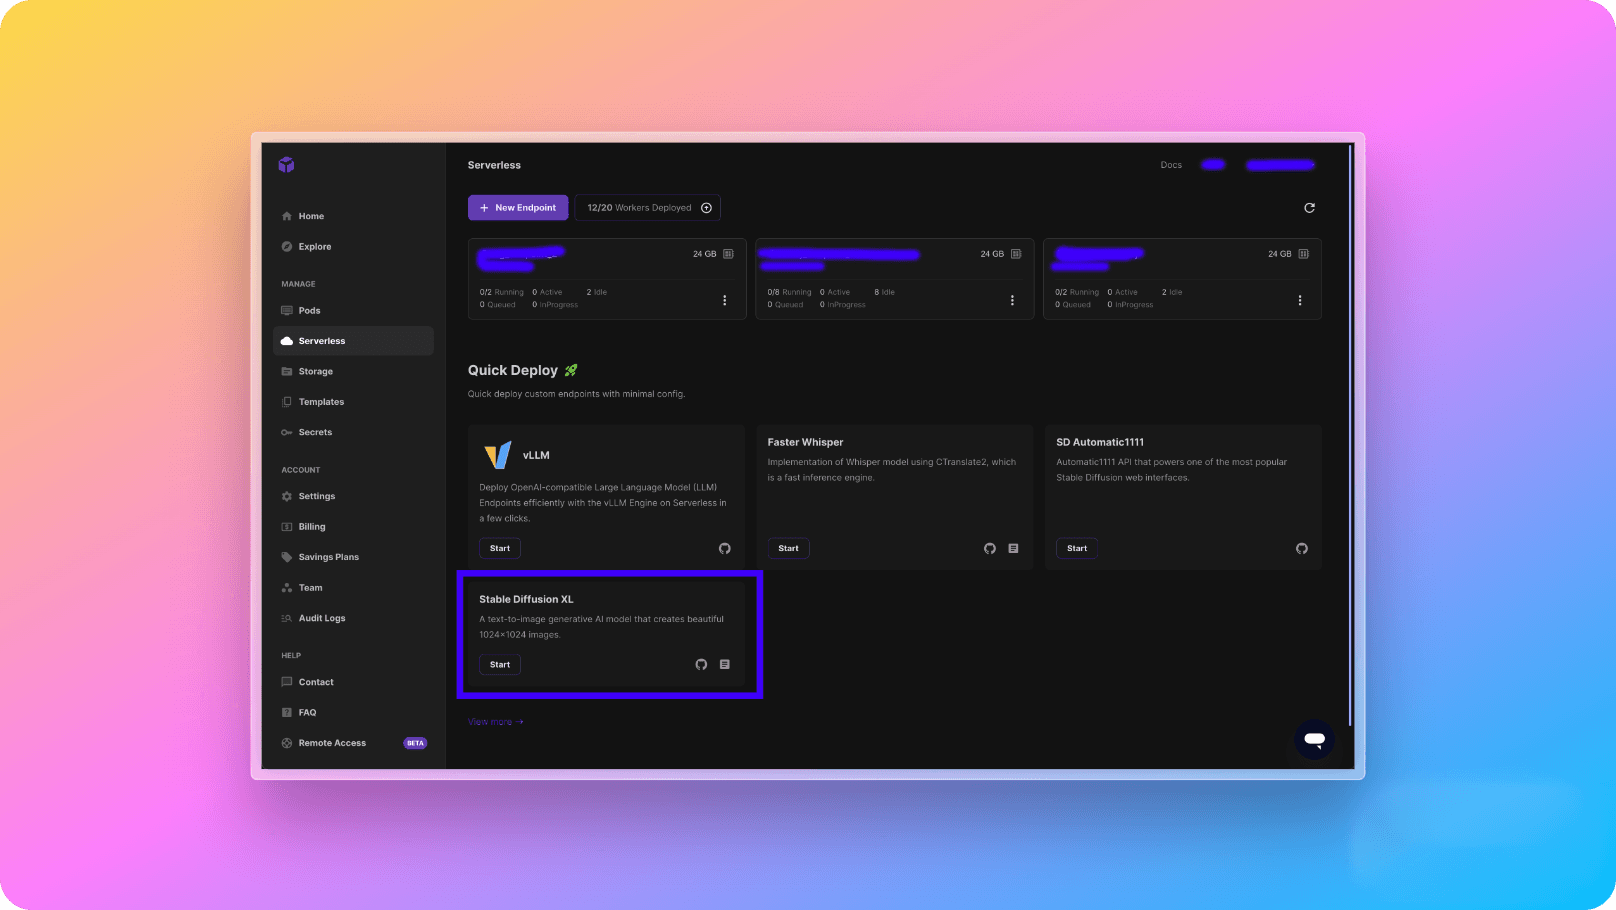
3. After creating RunPod API token on RunPod dashboard, you need to go to Serverless page and create any Stable Diffusion model you want. Stable Diffusion models are different by their output style. For example, as its name suggests, SD Open Journey is designed to generate images like MidJourney.
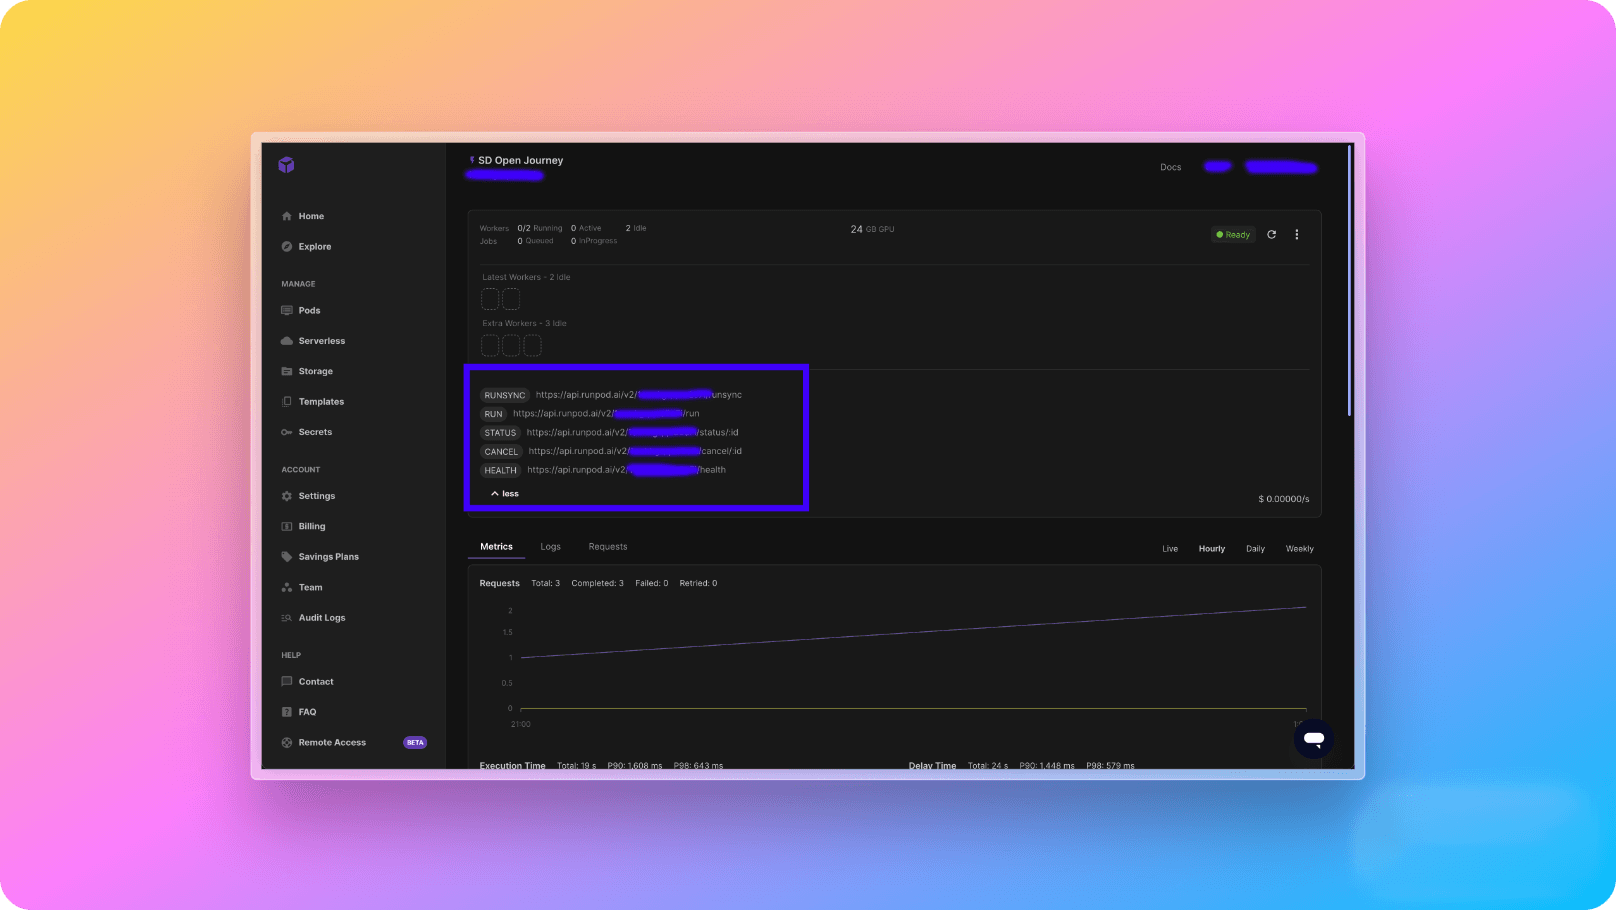
4- After deploying the model, you will start seeing the API endpoints on the page. These API endpoints are going to be used for generating images through Stable Diffusion model. The request and response body types are explained in this RunPod documentation. As a small code snippet of SD Open Journey endpoint for our use case, the request body will be like below:
1{
2  "input": {
3    "prompt": "Astronaut on the moon",
4    "width": 512,
5    "height": 512,
6    "guidance_scale": 7.5,
7    "num_inference_steps": 50,
8    "num_outputs": 1,
9    "prompt_strength": 0.8,
10    "scheduler": "K-LMS"
11  }
12}
5- The RUNSYNC API that you see on the RunPod dashboard will be added to react-native-starter-backend/functions/.env.local file's RUNPOD_TEXT_TO_IMAGE_ENDPOINT environment variable and your backend will be fully functional. 🎉